http://www.broadview.com.cn/book/156
0.1 https://www.nostarch.com/pythonwithminecraft/
1.1 https://www.nostarch.com/pythonwithminecraft/
1.2 https://minecraft.net/
1.3 https://minecraft.net/download
1.4 http://www.python.org/downloads/
1.5 http://www.java.com/en/download/
1.6 http://www.java.com/en/ download/help/path.xml
1.7 https://www.nostarch.com/pythonwithminecraft/
1.8 https://minecraft.net/download
1.9 https://www.python.org/downloads/mac-osx/
1.10 http://www.oracle.com/technetwork/java/javase/downloads/index.html
1.11 https://www.nostarch.com/pythonwithminecraft/
1.12 http://www.raspberrypi.org/
10.1 https://www.nostarch.com/pythonwithminecraft/
11.1 http://pypi.python.org/
11.2 http://flask.pocoo.org/docs/0.10/tutorial/
12.1 https://www.nostarch.com/pythonwithminecraft/
Troublshooting
https://nostarch.com/minecrafthelp
The book Learn to Program with Minecraft requires Minecraft 1.8 or 1.9, Python 3.6 or newer and Java 8 or newer. If you're having difficulty getting your environment set up, software versions are the most likely problem. Follow the instructions on this page to check that you are using the correct versions of Minecraft, Python, and Java.
If you've confirmed that you have the correct versions and you're getting other errors, refer to the later sections in this document (linked below).
Pick the Right Minecraft Version
Am I Using the Right Version of Python?
Am I Using the Right Version of Java?
What If I Have Two Versions of Python on My Computer?
Start_Server, File Cannot Be Found (For Windows)
Connection Refused Error (For Mac)
Nothing Happens After I Click Install_API (For Windows)
Permissions Error When Installing API (For Mac)
Unicode Decode Error (For Windows)
I Got a Different Error!
Unfortunately, we do not have any dedicated Python programmers on our team, so we are unable to troubleshoot more complex errors. Sorry for the inconvenience!
Pick the Right Minecraft Version
Purchase the standard Minecraft version from minecraft.net to follow along with the book. You must have Java Edition for Windows and OSX or Pi Edition for the Raspberry Pi.
Please know that Minecraft Windows 10 Edition, Minecraft for Xbox, Minecraft: Education Edition, and Minecraft: Pocket Edition are not compatible with the book.
In order to use your Spigot server, your Minecraft version needs to match the Spigot version exactly. But new versions of Minecraft come out all the time, so if you update Minecraft, Spigot won’t work with the new version anymore. In order to make your Spigot and Minecraft versions match, you can set up a profile.
When you set up a profile, you tell Minecraft that you only want to use the version of the game that will work with the version of the server that you are using. In other words, a profile allows you to continue using the same server even when newer versions of Minecraft are released.
Once you set up a profile, you should be able to use our book’s coding directions and you'll know one more of Minecraft’s secrets, and will be further along on your journey to become a Minecraft Master!
Let’s get started.
For Windows
You’ll need to set up a profile to make sure Spigot and Minecraft are always running the same version. To start Spigot, follow these steps:
Step 1. Go to your Minecraft Python folder and open your Minecraft Tools folder.
Step 2. In the Minecraft Tools folder, double-click the Start_Server file. If you get a message asking whether you want to allow access, click Allow.
Step 3. A window will appear and begin to set up the server. If you see a message that says the server is out of date, don’t worry; you don’t need to update the server for it to work.
Step 4. Once the setup is finished, scroll to the top of the text in the window. Near the top (around the third or fourth line), you should see text saying Starting minecraft server version x.x.x. For example, 1.16.3.
Step 5. Make a note of the version number shown on your screen, and keep this window open.
Now that you know which server version you’re using, you can set up the game profile:
Step 1. Open the Minecraft launcher, but don’t click the green PLAY button quite yet (make sure you leave the server window open when you do this).
Step 2. At the top-right of the Minecraft launcher, click the menu button (which looks like three parallel lines), then click the Launch Options button. This will allow you to access the profile editor.
Step 3. Click the Add New button to create a new configuration.
Step 4. In the Name field, type Learn to Program with Minecraft.
Step 5. In the Version drop-down menu, select the version of the server that you’re using. For example, version 1.16.3.
Step 6. Click the Save button. Your profile has now been set up. Click the central Minecraft logo to return to the screen with the green PLAY button.
From now on, every time you want to use Minecraft with this book, click the arrow next to the Minecraft launcher’s start button. Select the Learn to Program with Minecraft option to use the correct version for the server. You can swap back to the latest version of Minecraft at any time by changing this drop-down menu to the Latest Release option. Once you have selected the correct version, click PLAY!
For Mac
You’ll need to set up a profile to make sure Spigot and Minecraft are always running the same version. To start Spigot, follow these steps:
Step 1. Go to your MinecraftPython folder and open your MinecraftTools folder.
Step 2. In the MinecraftTools folder, CONTROL-click the Start_Server file and select Open. (If you get an error message, go to System Preferences and then to Security and Privacy and click Open Anyway.)
Step 3. Once the setup is finished, scroll to the top of the text in the window. Near the top (around the third or fourth line), you should see text saying Starting minecraft server version x.x.x. For example, version 1.16.3.
Step 4. Make a note of the version number shown on your screen, and keep this window open.
Now that you know which server version you’re using, you can set up the game profile:
Step 1. Open the Minecraft launcher, but don’t click the green PLAY button quite yet.
Step 2. In the top-right corner of the Minecraft launcher, click the menu button (which looks like three parallel lines), then click the Launch Options button. This will allow you to access the profile editor. Click the Add New button to create a new configuration.
Step 3. In the Name field, type Learn to Program with Minecraft.
Step 4. In the Version drop-down menu, select the version of the server that you’re using. For example, version 1.16.3.
Step 5. Click the Save button. Your profile has now been set up. Click the X in the upper-right corner, then click the central Minecraft logo to return to the screen with the green PLAY button.
From now on, every time you want to use Minecraft with this book, select the Learn to Program with Minecraft option in the drop-down menu to the right of the green PLAY button. You can swap back to the latest version of Minecraft at any time by changing this drop-down menu to the Latest Release option.
Am I Using the Right Version of Python?
Follow these steps to make sure you're running Python 3.6 or newer.
Note: If you find that you have both Python 2 and Python 3 installed, you should uninstall Python 2—or follow the instructions in “What If I Have Two Versions of Python on My Computer?” below.
For Windows
The simplest way to confirm you’ve gotten the right version of Python is to go to the Start menu, then search for Python. If you don’t see a search box, you can just start typing Python to search. This will show you every version of Python that you have installed on your machine. The Python version number might be part of the name that shows up in the Start menu; if not, open IDLE and the version number will be displayed in the shell.
If you don’t have version 3.6 or newer, you’ll need to install the updated version. Follow the steps in “Installing Python” in the book.
For Mac
Step 1. Open Finder and search for Terminal. Click Terminal to open it.
Step 2. At the Terminal prompt, enter Python -V (note that the V is uppercase).
Step 3. You will see the Python version number—if it's anything older than 3.6, you'll need to install an updated version. Follow the steps in Chapter 1 to install Python version 3.6.
Am I Using the Right Version of Java?
Follow these steps to make sure you're running Java 8 or newer.
For Windows
You should be able to see all the installed programs in the Windows Start menu, including Java. The simplest way determine which version you have installed is to do the following:
Step 1. Go to the Start menu.
Step 2. Choose All Programs.
Step 3. Find the Java folder and click About Java.
You can also test the version of Java by using this method:
Step 1. Open the Start menu, search for cmd, and open the command prompt.
Step 2. Run the command java -version. You will see a message that says something like java version "1.8.0_72". The version of Java that you are using is the number after the first dot, which is version 8 in our example message. If your version is older than 8 (or if Java isn’t installed at all!), you’ll need to update or install Java. To do so, follow the installation instructions in Chapter 1.
For Mac
Step 1. Open Finder and search for Terminal. Click Terminal to open it.
Step 2. At the Terminal prompt, type java -version and press RETURN.
Step 3. You will see a message that says something like java version "1.8.0_72". The version of Java that you are using is the number after the first dot, in this case version 8. If your version is older than 8, you'll need to update Java. To do so, follow the installation instructions in Chapter 1.
What If I Have Two Versions of Python on My Computer?
If you want to have both Python 3 and an older version of Python installed, and if you have an older version of the Install_API file, you need to modify the file to specify that it should use Python 3 rather than the older version.
The Minecraft Python API will work with older versions of Python, but you must use Python 3 if you want to run all the code examples from this book—otherwise you’ll get an error if you try to use the print() function and a few other Python things. But you can still keep another, older version of Python on your computer if you want to.
Install the Minecraft Python API by following the Windows or Mac instructions in the following sections. Once you’ve installed the API, you’ll need to make sure that you use the correct version of IDLE. Make sure you use IDLE 3 when writing and running code—otherwise the programs from this book will not work.
For Windows
If you have the older version of the Install_API file, then you’ll need to modify it. To modify the In-stall_API file, follow these steps:
Step 1. Open the Minecraft Tools folder and find the Install_API file.
Step 2. Right-click the Install_API file and select Edit.
Step 3. Once the file opens, find the line that begins with this:
python -m pip install minecraftPythonAPI.zip
Step 4. Edit the line by changing python to python3 so that the line looks like this:
py -3 -m pip install minecraftPythonAPI.zip
Step 5. Save the file and close it.
Step 6. Double-click the Install_API file to install the Minecraft Python API.
For Mac
If you have the older version of the Install_API file, then you’ll need to modify it. To modify the In-stall_API file, follow these steps:
Step 1. Open the Minecraft Tools folder and find the Install_API file.
Step 2. Control-click the Install_API file and select Edit.
Step 3. Once the file opens, find the line that begins with this:
python -m pip install minecraftPythonAPI.zip
Step 4. If you can’t find that line, then you already have the new file and don’t need to do anything else. Otherwise, edit the line by changing python to python3 so that the line looks like this:
python3 -m pip install minecraftPythonAPI.zip
Step 5. Save the file and close it.
Step 6. Double-click the Install_API file to install the Minecraft Python API.
Start_Server, File Cannot Be Found (For Windows)
When you click on the Start_Server file you might see a window saying “Windows cannot find 'C:\Users\Frank\Documents'” or something similar.
To work around this issue, open the server folder and double click on the start.bat file. The server should start normally. Every time you need to start the server in the future repeat these steps.
Alternatively, download the latest version of the book's setup files, Minecraft Tools, linked on the book's web page.
Connection Refused Error (For Mac)
In Python, after typing the line mc = Minecraft.create(), you might get an error message like this:
ConnectionRefusedError: [Errno 61] Connection refused
or a similar error like this:
ConnectionRefusedError: [Errno 10061] No connection could be made because the target machine actively refused it.
This error is most frequently caused by an out-of-date version of Java installed on your computer. In order to fix this issue, follow the Java installation instructions in Chapter 1.
If you still get this error after reinstalling Java, your Mac might be using an old version of Java only on the command line. To fix this issue, do the following:
Step 1. Click the search icon on the top-right corner of your screen.
Step 2. In the search box, enter Java Preferences.
Step 3. When the preferences box opens, make sure that only the Java 8 checkbox is ticked.
After you have changed these preferences, the problem should be resolved. However, if you still have this issue, uninstall older versions of Java and then reinstall Java 8.
Nothing Happens After I Click on Install_API (For Windows)
When you run the Install_API file during step 5 of “Installing the Minecraft Python API and Spigot” (page 6), you might see a black window pop up.
If you see a window like this, you might be experiencing a bug with pip, which is used to install the API. To work around this, you need to install the Minecraft Python API via the command line. Follow these steps:
Step 1. Open the Minecraft Tools folder. You should see the minecraftPythonAPI.zip file.
Step 2. In the file browser, click the address bar to highlight it, then copy the text (right-click and select Copy, or press CTRL-C). The address should look something like this:
C:\Users\user\Minecraft Python\Minecraft Tools
Step 3. Click the Start menu and search for PowerShell. Click PowerShell to open it.
Step 4. At the PowerShell prompt, type cd and then right-click to paste the address of your Minecraft Tools folder.
Step 5. Add single quotation marks around the text you just pasted. The line should look something like this:
cd 'C:\Users\user\Minecraft Python\Minecraft Tools'
Step 6. Press ENTER. Now you can run commands in PowerShell using the contents of the Minecraft Tools folder.
Step 7. On the next line, type the following command to install the API:
python -m pip install minecraftPythonAPI.zip
Step 8. Press ENTER. The Python API should now be installed correctly.
Permissions Error When Installing API (For Mac)
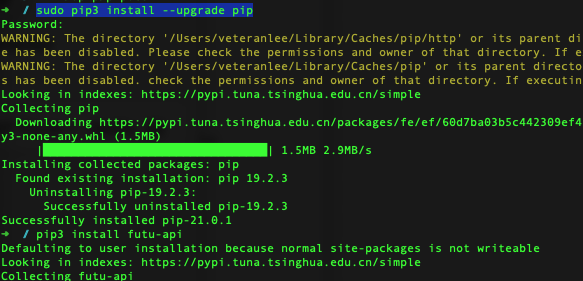
During step 8 of “Installing the Minecraft Python API and Spigot” in Chapter 1, you might get this error:
The directory '/Users/YourUserName/Library/Caches/pip/http' or its parent
directory is not owned by the current user and the cache has been
disabled. Please check the permissions and owner of that directory. If
executing pip with sudo, you may want sudo's -H flag.
Check all the folders that the Install_API file is inside of and remove any spaces from the folder names. To do this, follow these steps:
Step 1. Control-click the icon of the folder with a space in the name.
Step 2. From the pop-up menu, select Rename, then remove the space from the folder’s name. Note that you should not have to do this with the hard drive itself (Macintosh HD)!
Once you have done this, try running the Install_API file again.
On some Macs, you might still get an error—however, the API has still installed correctly. If you see the following line, the API has installed correctly and you can ignore the error message:
Requirement already satisfied (use -–upgrade to upgrade): py3minepi…
Unicode Decode Error (For Windows)
When you run the Install_API file during step 5 of “Installing the Minecraft Python API and Spigot” in Chapter 1, you might get this error:
UnicodeDecodeError: 'utf-8' codec can't decode byte 0xc0 in position 44: invalid start byte
Your Windows system may be using an encoding method that's different from the one Python assumes. Follow these steps:
Step 1. Navigate to
'C:\Users\user\AppData\Local\Programs\Python\Python36\Lib\site-packages\pip\compat'
This path is for those running Python 3.6 and will differ slightly for other versions.
Step 2. Open init.py in a text editor, and change line 75 to this:
return s.decode('cp949')
Making this change and saving the file should resolve the problem.
I Got a Different Error!
Unfortunately, we do not have a dedicated Python programmer on our team, so we are unable to troubleshoot more complicated issues on your behalf at this time. If you get an error that isn't listed on this page, we would encourage you to search for the error online. We're sorry for the inconvenience, but thank you for your understanding!
