基本操作
绑定用户名和邮箱地址
(venv) 22-05-17/Users/XXXXX/study/watchlist~%>git --version
git version 2.30.1 (Apple Git-130)
(venv) 22-05-17/Users/xxxxx/study/watchlist~%>git config --global user.nam
e "xxxxxxx"
(venv) 22-05-17/Users/xxxxx/study/watchlist~%>git config --global user.ema
il "xxxxxx@outlook.com"
查看本地分支
test~%>git branch -vv
* flask     71a338f this is a test of microblog project
  flasktest 71a338f this is a test of microblog project
  master    71a338f this is a test of microblog project
查看远程分支
watchlist~%>git branch -r
  origin/master

删除本地分支
microblog/test~%>git branch -d flasktest
Deleted branch flasktest (was 71a338f).
查看配置列表
test~%>git config --list
remote.origin.url=git@github.com:XXXXXX/flasktest.git
remote.origin.fetch=+refs/heads/*:refs/remotes/origin/*
branch.master.remote=origin
push与pull
push命令
push命令用来将远程分支内容,拉取到本地分支上,当远程分支和本地分支名称一致时,可以省略本地分支名称,push命令中的origin会让人很疑惑
pull命令
push与pull命令参考
建立或删除本地库与远程库的绑定
建立本地库与远程库的绑定关系,和远程库进行绑定时,需要给远程库一个名字,一般来说origin就是默认的名称
xxx/flasky/watchlist~%>git remote add origin git@github.com:xxx/watchlist.git
删除本地库和远程库的绑定,注意这里只是删除了本地库与远程库之间的映射关系,并没有真的删除任何物理内容。
xxx/flasky/watchlist/watchlist~%>git remote rm origin
xxx/flasky/watchlist/watchlist~%>git remote -v
如果有绑定的远程库,命令“git remote -v”会显示如下

现在因为我使用git remote rm origin命令删除了绑定关系,则git remote -v什么都不会显示,因为linux的最大理念就是,“没有消息就是好消息”😊
fatal: refusing to merge unrealated histories
xxxx/flasky/watchlist~%>git pull origin master
From https://github.com/xxxx/watchlist
 * branch            master     -> FETCH_HEAD
fatal: refusing to merge unrelated histories
The “fatal: refusing to merge unrelated histories” Git error occurs when two unrelated projects are merged, and two projects are unaware of each other existence and having mismatch commit histories.
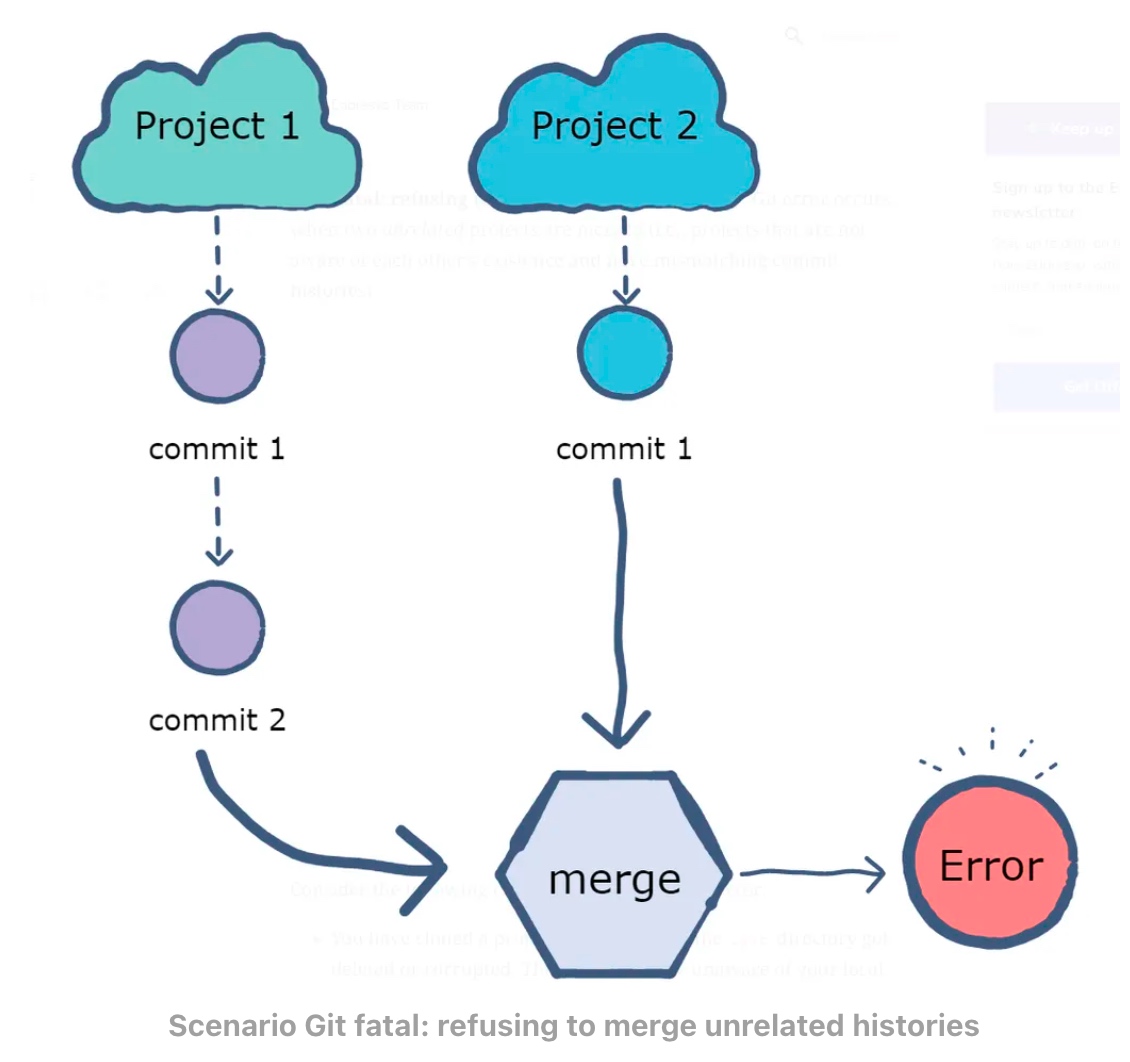
To provide a little background .git directory, which is usually hidden, contains all the changes or “commits” of the repo that gets tracked. Rewriting the repository history is possible, but it’s generally not the typical use case. Git is used for version control, which means to track the history of the file.
Use Cases that lead to git fatal: refusing to merge unrelated histories
If you have cloned a repository and, for some reason, the .git folder is corrupted or deleted. Since git will be unaware of your local history, any action you perform like git pull or git push to remote repository will throw this error as there is no tracking information for the current branch.
You have created a new repository, made few commits to it, and now try to pull a remote repository that already has its own commits. Git will throw an error here since it is unaware of how these two projects and commits are related.
The solution to Refusing to merge unrelated histories
The error started occurring from git version 2.9.0 release notes and above. To solve this issue –allow-unrelated-histories flag when pulling the data from remote repository.
解决unrelated histories问题参考
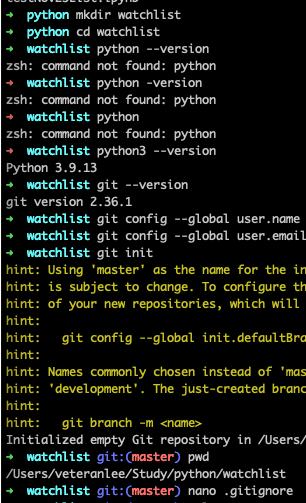
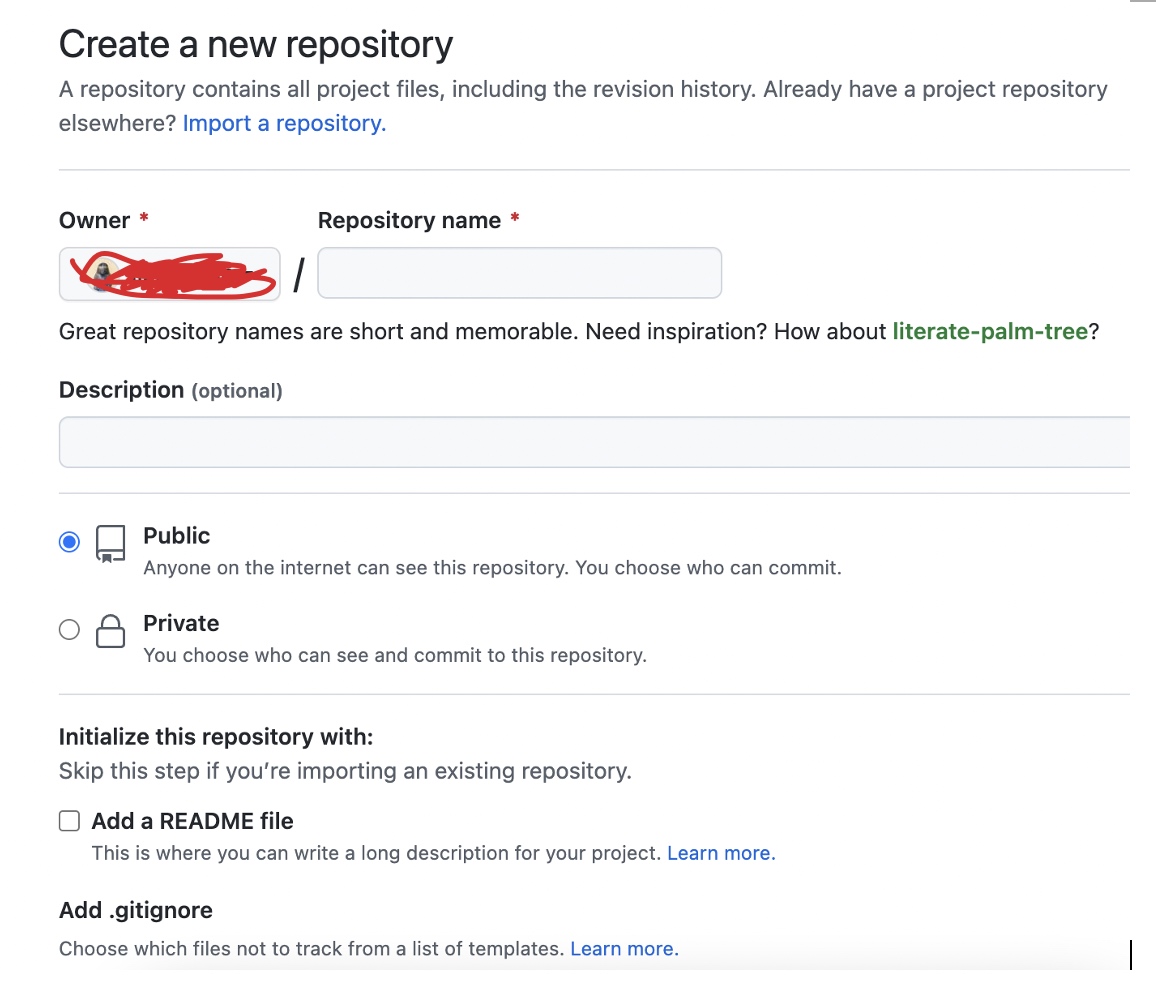
全流程概要
- 1 绑定用户名和邮箱地址(SSH指纹也提前关联好)
- 2 mkdir watchlist
- 3 初始化本地库
xxxx/flasky/watchlist~%>git init
Initialized empty Git repository in /Users/xxxx/Study/flasky/watchlist/.git/
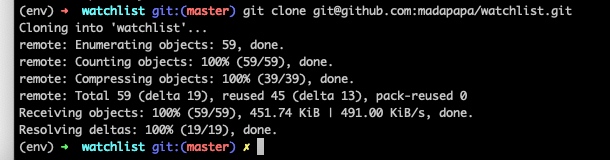
flasky/watchlist~%>git remote add origin git@github.com:madapapa/watchlist.git
xxxx/flasky/watchlist~%>git remote -v
origin	git@github.com:madapapa/watchlist.git (fetch)
origin	git@github.com:madapapa/watchlist.git (push)
- 6 同步远程库内容,忽略unrelated histories问题
xxxx/flasky/watchlist~%>git pull origin master --allow-unrelated-histories
remote: Enumerating objects: 49, done.
remote: Counting objects: 100% (49/49), done.
remote: Compressing objects: 100% (33/33), done.
remote: Total 49 (delta 16), reused 38 (delta 10), pack-reused 0
Unpacking objects: 100% (49/49), 438.70 KiB | 477.00 KiB/s, done.
From github.com:madapapa/watchlist
 * branch            master     -> FETCH_HEAD
 * [new branch]      master     -> origin/master
-
7 我没有新建gitignore文件
-
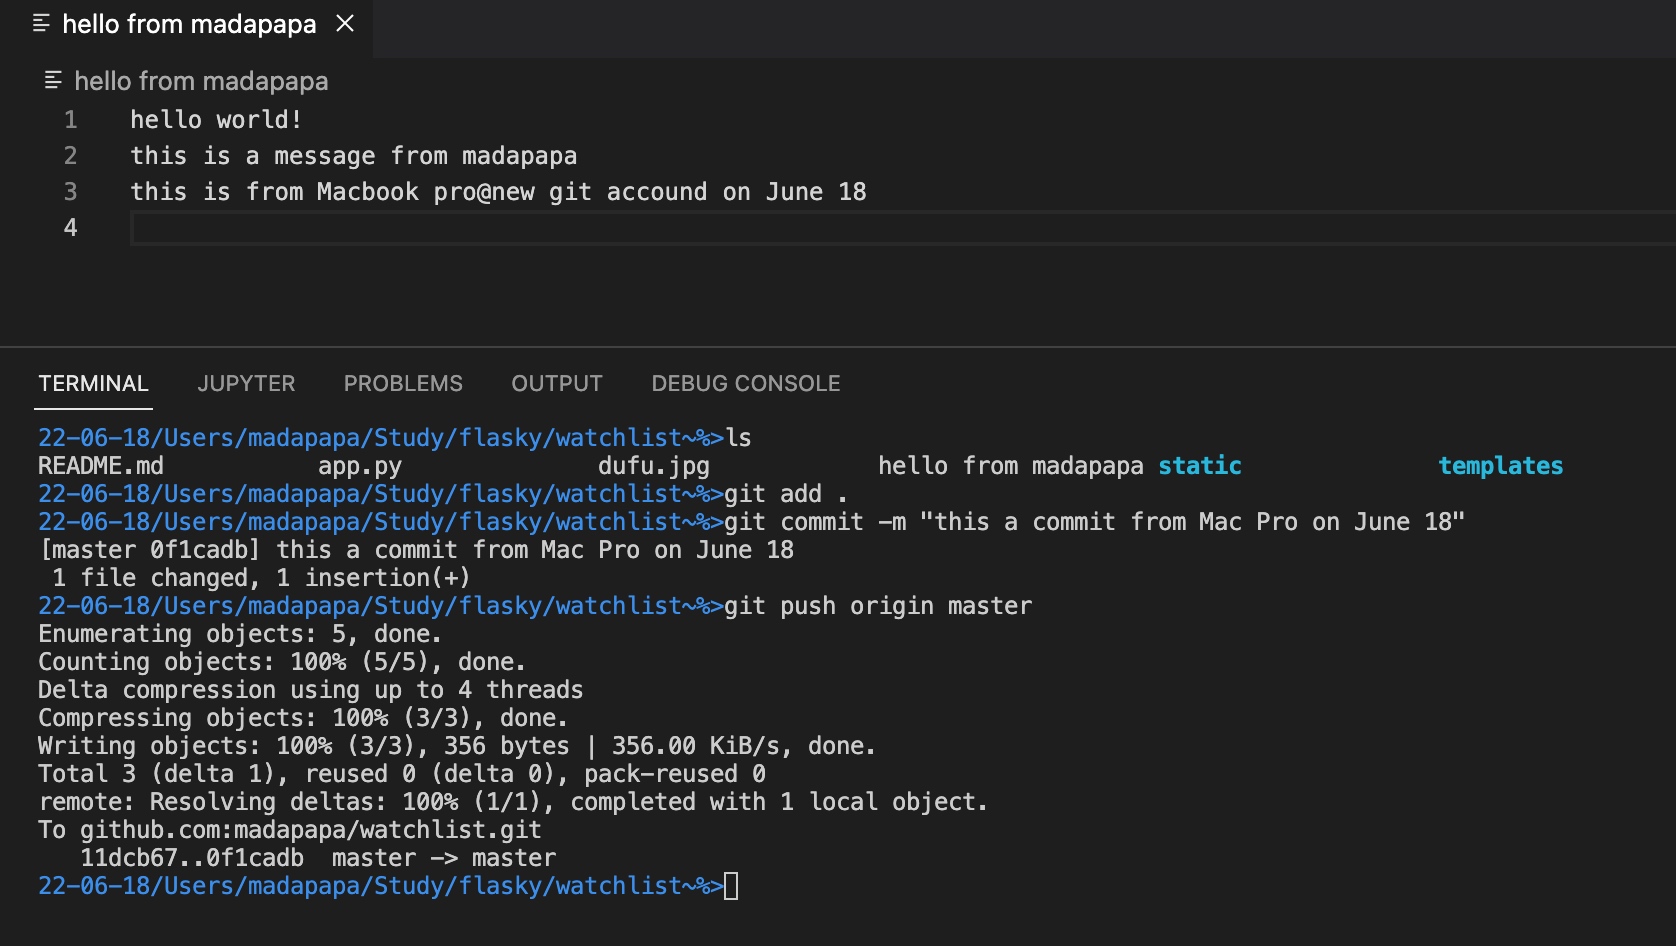
8 在本地修改文件后,进行提交工作
【注意】这里的push命令在第一次使用时,一般建议附带-u参数,这样Git不仅会把本地master分支的内容更新到远程新建的master分支上,还会把本地master和远程的master关联起来,在以后的推送和拉取时就可以简化命令(不需要带-u参数,直接git push即可)。
git常用命令