初探minikube

  1. dashboard
    使用一条简单命令,就可以启动dashboard服务,不过这个服务是构建在docker里的,所以在os里,使用systemctl 没法显示出来。

    如果要查看k8s管理的服务有哪些,可以使用如下命令
k8s@MDaliyun:~$ kubectl get namespaces

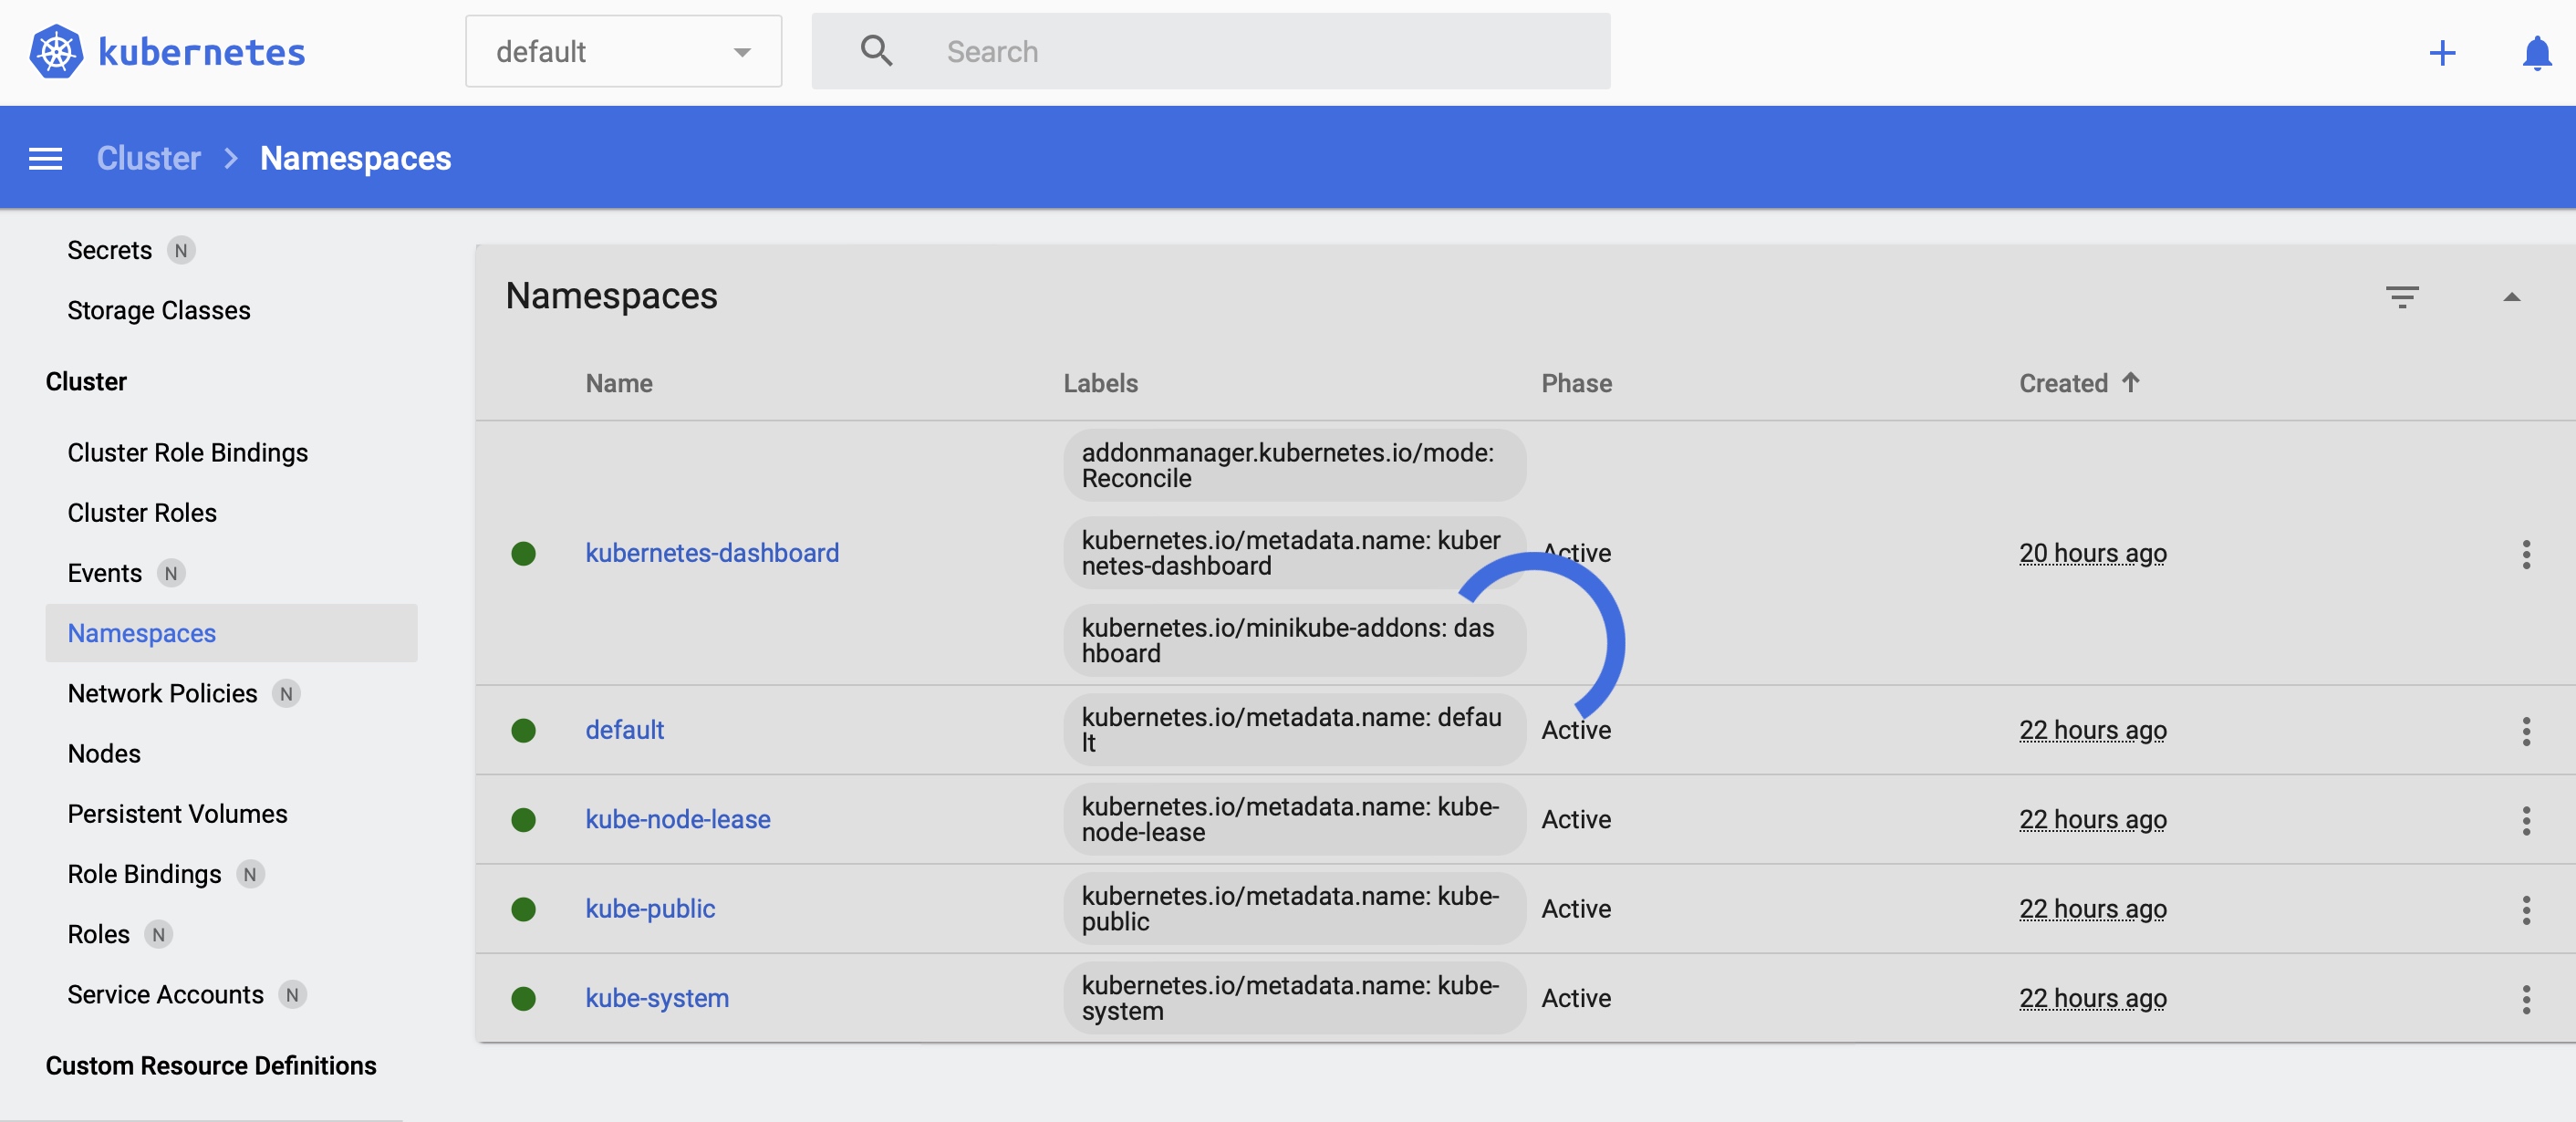
显示所有namespaces

将本地电脑的12345端口映射到远程服务器的对应端口(-L参数–本地,-R参数–远程),执行后需要输入k8s这个用户的密码.
这里需要解释一下:

  • 通用命令是:ssh -L 本地ip:本地端口:目的ip:目的端口 user@server_ip
  • 当源ip就是本机时,可以省略,如果需要绑定同一个局域网的另外一台机器时,就要把源ip写上,例如192.169.1.2.
  • 目的ip,是我们要映射的server的127.0.0.1,也就是localhost,当然,也可以是与映射server同一个局域网的其他机器,例如172.0.0.10,或者域名地址(需要私网域名解析)
  • 当然,这就带来一个非常大的好处,比如我们在远程服务器上,如果有一个docker服务需要暴露8080端口时,如果采用ssh映射方式,就不需要云服务器开通安全组了。
ssh -L 12345:localhost:12345  k8s@server_ip 

执行成功后,打开下面的链接,就可以使用本地浏览器管理dashboard了

http://127.0.0.1:12345/api/v1/namespaces/kubernetes-dashboard/services/http:kubernetes-dashboard:/proxy/#/namespace?namespace=default

如果要暂停dashboard的服务,没有stop之类的命令,可以采用资源降级、删除对应namesapce、

k8s@MDaliyun:~$ kubectl scale deployment kubernetes-dashboard -n kubernetes-dashboard --replicas=0
deployment.apps/kubernetes-dashboard scaled

删除pod相关资源后,本地浏览器的dashboard呈现菊花状态

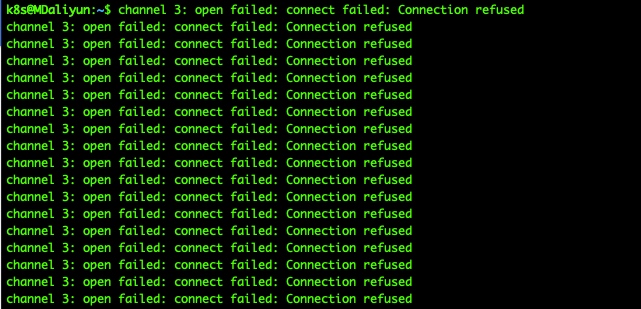
ssh隧道映射也就失效了

  1. http service

  2. 其他命令
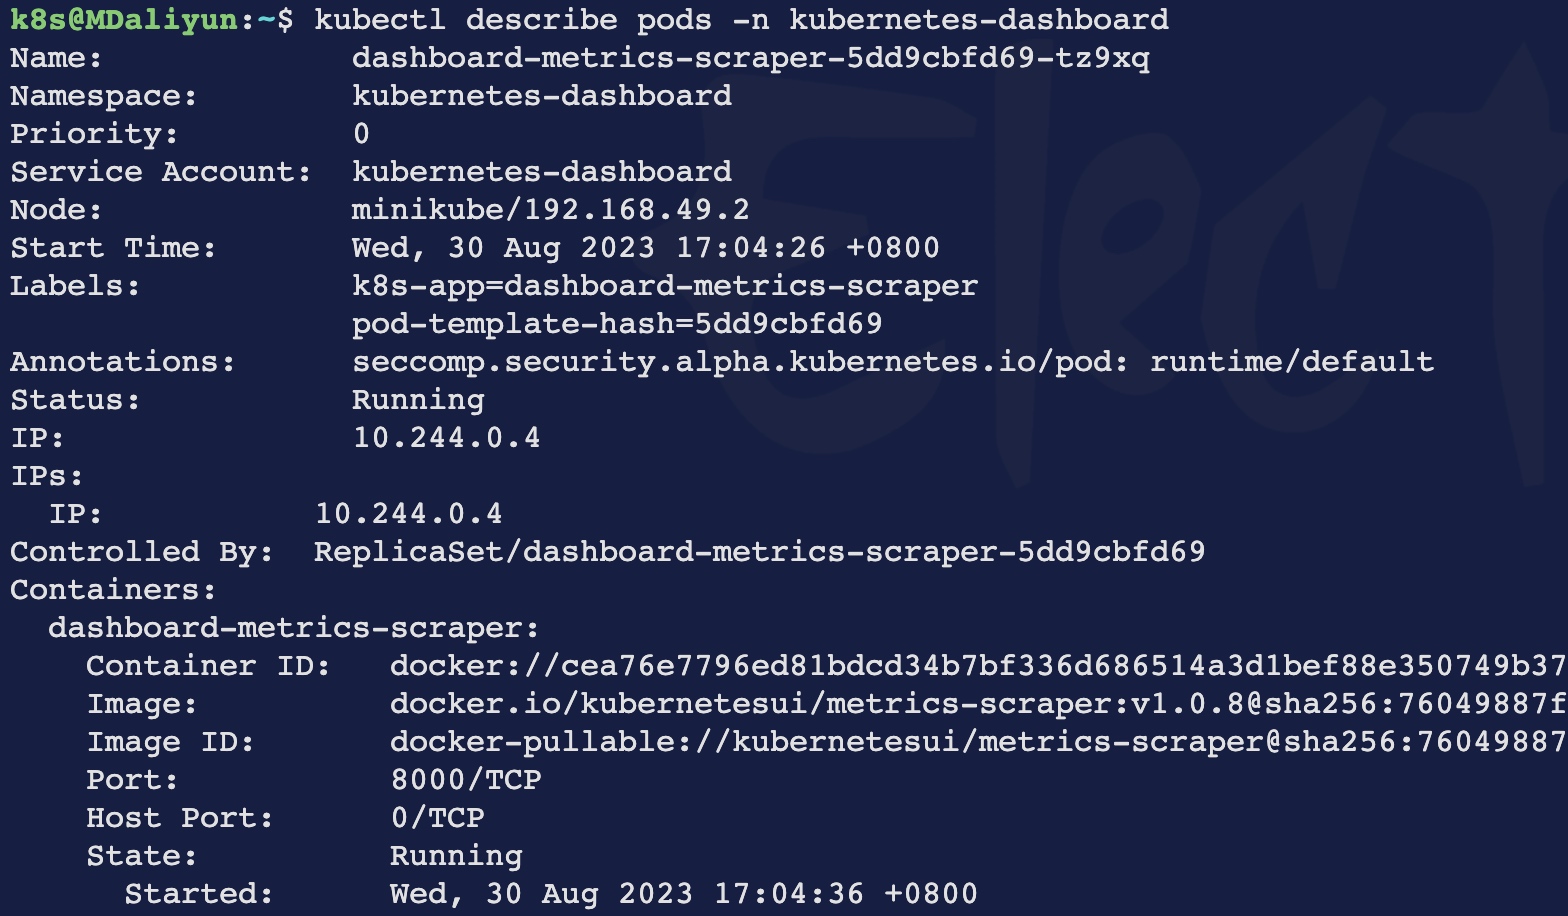
    获取更详细的pod资料

k8s@MDaliyun:~$ kubectl describe pods -n kubernetes-dashboard
Name:             dashboard-metrics-scraper-5dd9cbfd69-tz9xq
Namespace:        kubernetes-dashboard
Priority:         0
Service Account:  kubernetes-dashboard
Node:             minikube/192.168.49.2
Start Time:       Wed, 30 Aug 2023 17:04:26 +0800

从minikube到portainer

下午原计划从b站的“三小时学会k8s”入手,没想掉入portainer的坑,还好一切顺利

portainer

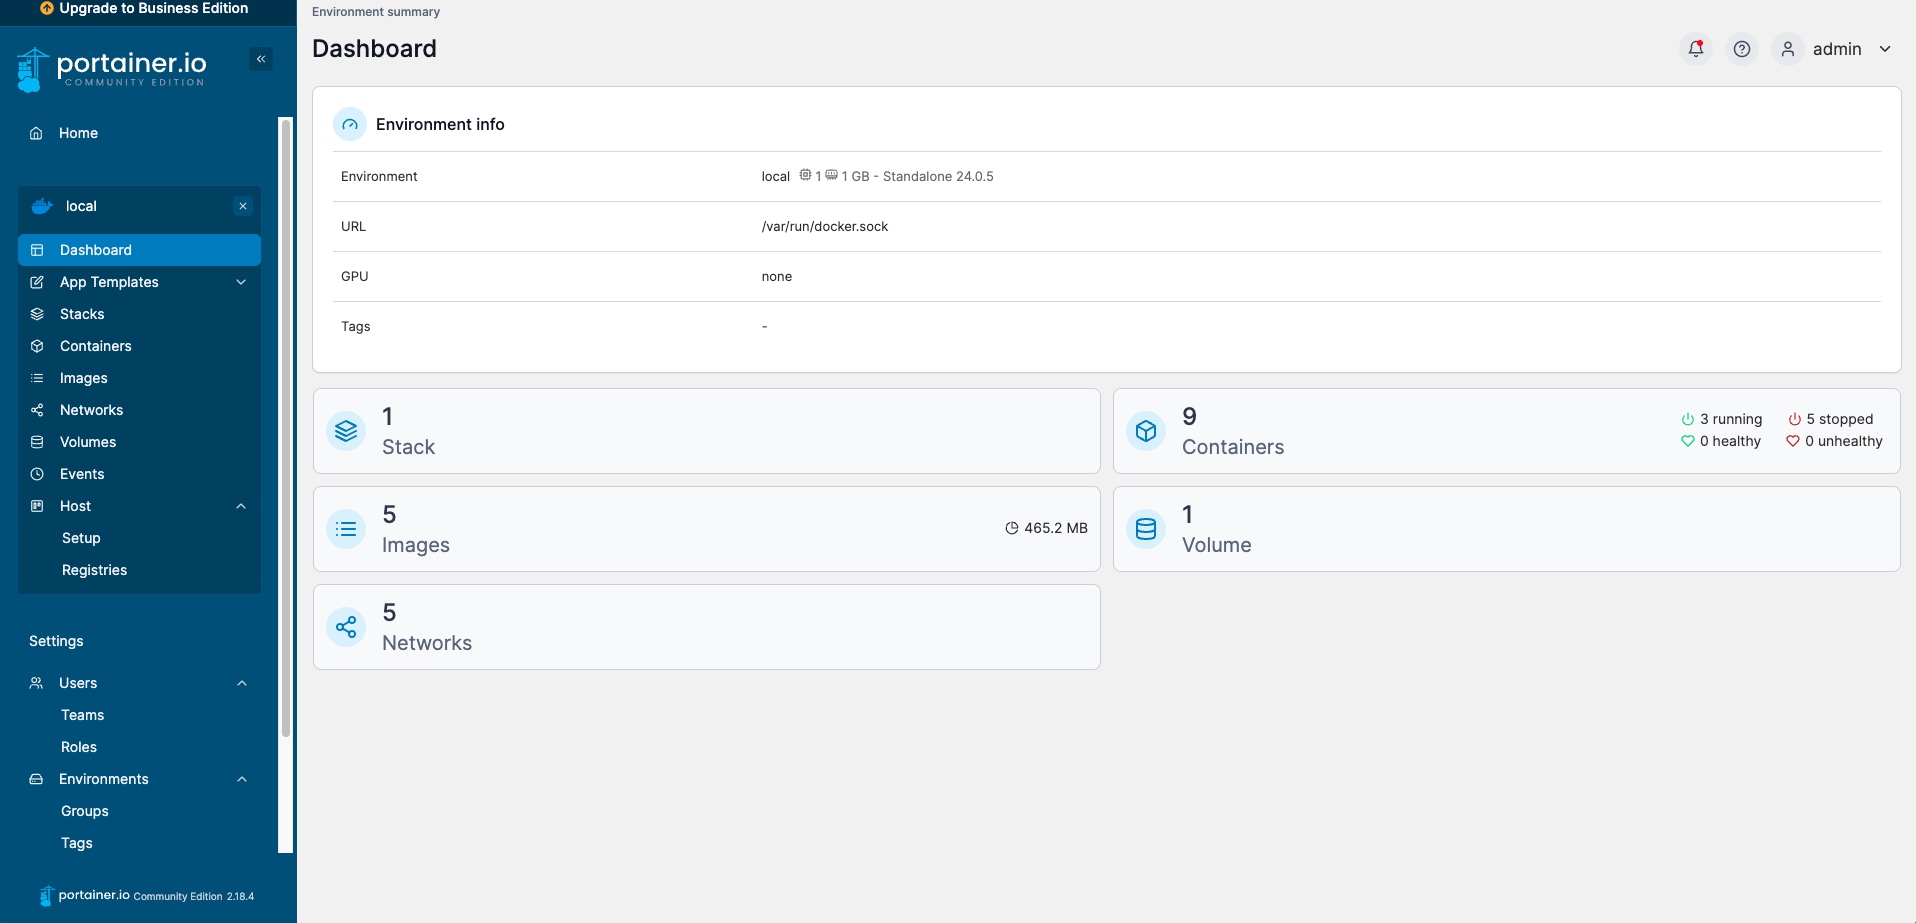
portainer是一个非常轻量化的docker管理工具,图形化界面,支持ubuntu,安装过程如下

  1. 首先建立一个docker的专门目录 docker_project,进入目录
    mkdir portainer

  2. 在portainer目录下,建立一个docker compose可以使用的yml文件:
    nano docker-compose.yml
    文件内容如下,其中8083是宿主机的端口号,需要请云主机管理员帮你打开权限:

    version: '3'
    services:
      portainer:
        image: portainer/portainer-ce
        container_name: portainer
        ports:
          - "8083:9000"
        volumes:
          - /var/run/docker.sock:/var/run/docker.sock
          - portainer_data:/data
    volumes:
      portainer_data:
    
    
  3. 使用如下命令,上面的yml文件相当于定义了portainer service的启动配置,也就是使用‘portainer/portainer-ce’的镜像文件,并绑定到8083端口上(9000是容器的端口),而且创建了portainer data卷。使用docker-compose 命令启动portainer容器
    docker-compose up -d

  4. 好了,使用浏览器进入本地或者你的远程服务器地址:8083,就可以对服务器上的docker进行管理。

minikube

  1. 首先安装kubectl,这是一个用来管理k8s集群的命令行工具,对于管理部署、services、pods和其他资源非常关键,在ubuntu的默认包里是没有的,所以需要从k8s官方repo里下载最新版本。

    sudo apt install curl
    curl -LO "https://dl.k8s.io/release/$(curl -L -s https://dl.k8s.io/release/stable.txt)/bin/linux/amd64/kubectl"
    chmod +x kubectl
    sudo mv kubectl /usr/local/bin/


    上述命令下载最新kubectl后,修改其属性为可执行,然后把它移动到path目录以便可以从terminal里执行。
    然后对安装结果进行校验

    kubectl version --client
    

    下面是巨坑时刻,折腾了1个小时,因为dl.k8s.io在google上,总是下载失败,所以按照chatgpt建议打算替换如下国内镜像:

        https://dl.k8s.io
    
    curl -LO "https://mirrors.ustc.edu.cn/kubernetes/apt/dists/kubernetes-jessie/release/$(curl -L -s https://mirrors.ustc.edu.cn/kubernetes/apt/dists/kubernetes-jessie/release/stable.txt)/bin/linux/amd64/kubectl"
    
    curl -LO "https://mirrors.aliyun.com/kubernetes/$(curl -L -s https://mirrors.aliyun.com/kubernetes/stable.txt)/bin/linux/amd64/kubectl"
    
    KUBE_VERSION=$(curl -L -s https://mirrors.cloud.aliyuncs.com/kubernetes/stable.txt)
    curl -LO "https://mirrors.cloud.aliyuncs.com/kubernetes/${KUBE_VERSION}/bin/linux/amd64/kubectl"
    
    curl -L -s https://mirrors.cloud.aliyuncs.com/kubernetes/stable.txt
    
    https://mirrors.aliyun.com/kubernetes/
    https://mirrors.ustc.edu.cn/kubernetes/
    

    当然还是失败,最终多问了几次chatgpt,按照如下方式安装成功

    sudo apt update
    sudo apt install snapd
    

    Once you have snapd installed and the system restarted (if necessary), you can now install kubectl using snap:

    sudo snap install kubectl --classic
    kubectl version --client
    

    minikube start

    What you’ll need
    2 CPUs or more
    2GB of free memory
    20GB of free disk space
    Internet connection
    Container or virtual machine manager, such as: Docker, QEMU,    Hyperkit, Hyper-V, KVM, Parallels, Podman, VirtualBox, or VMware   Fusion/Workstation
    

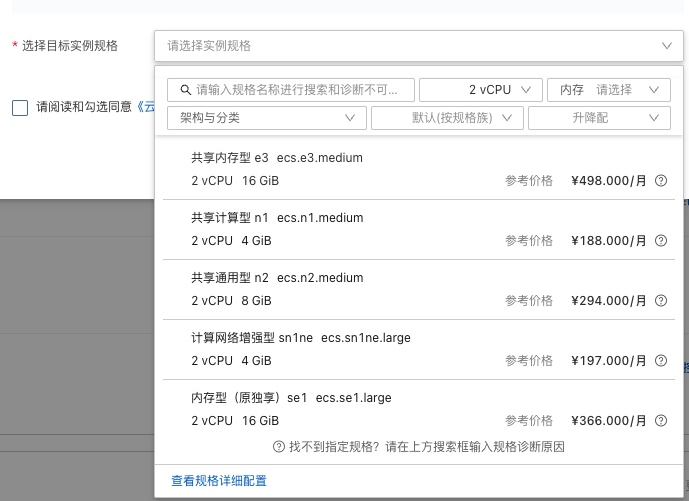
    都是钱

    尽量不要使用root账号

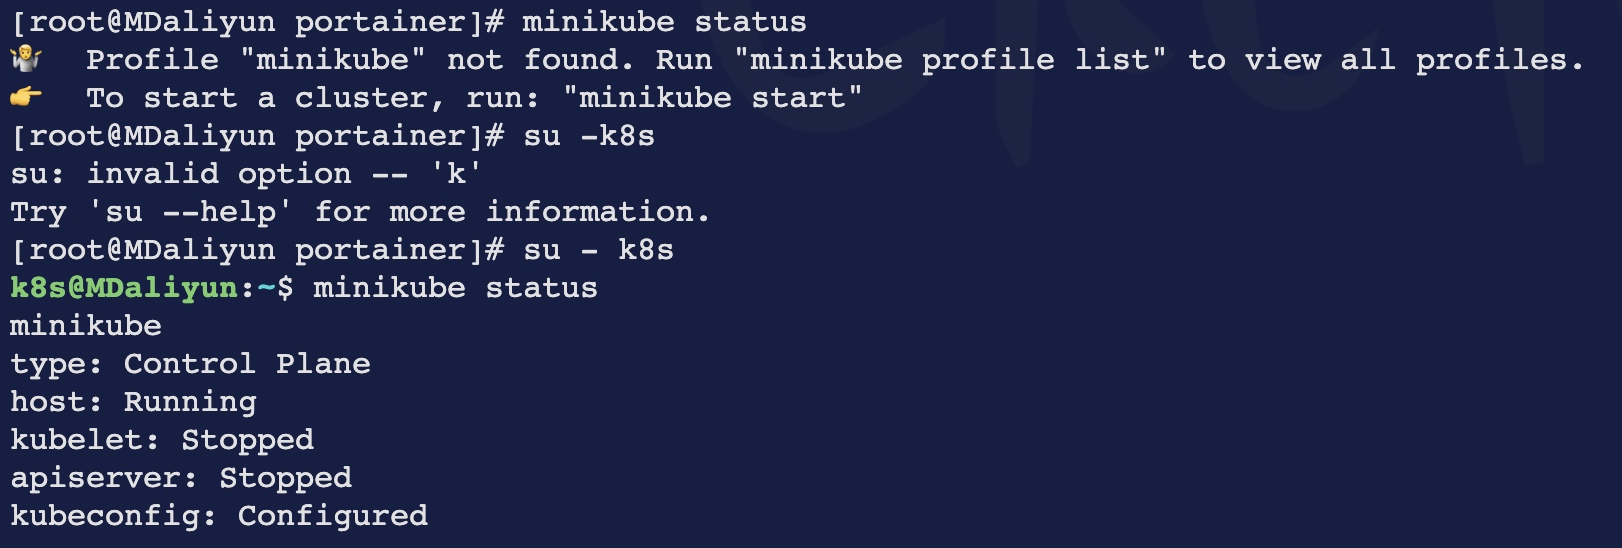
    这时候要注意,如果从portainer后台启动minikube的容器,实际是没有运行起来的

    使用none root用户启动minikube

    成功!

    docker run -d -p 8081:80 docker/getting-started

参考
https://www.xtuos.com/214719.html
不使用用docker compose来安装portainer:https://www.jianshu.com/p/ce225a5bfbd1

在m1电脑上重新安装brew并更新系统

MacBook使用笔记:安装Homebrew(M1)(https://zhuanlan.zhihu.com/p/372576355)

作者 | 公众号:程序员的一天

一、Homebrew是什么?

Homebrew官网:

英文:
https://brew.sh
中文:
https://brew.sh/index_zh-cn
Homebrew是MacOS(或 Linux)的软件包管理器。

通过它,我们可以方便的对Mac上的各种应用软件进行管理,例如:安装、更新、查看、搜索、卸载等。

Homebrew,可谓是Mac神器,几乎每一位Mac使用者都会安装它。

用Homebrew官网的一句话总结:

Homebrew 使 macOS(或您的 Linux 系统)更完整。

二、Mac上安装Homebrew

Homebrew 3.0.0版开始,正式支持Apple M1芯片,M1用户放心安装!
第一步:

打开终端。不知道如何打开终端的朋友,请参考:

爱码士:MacBook使用笔记:打开终端
45 赞同 · 2 评论文章

第二步:

在终端命令行窗口输入安装命令。

这里需要特别说明几点内容。

下面是Homebrew官方给出的安装命令:(如果没有VPN,不要使用此命令安装!)

/bin/bash -c "$(curl -fsSL https://raw.githubusercontent.com/Homebrew/install/HEAD/install.sh)"
通常情况下,官网给出的指令会报错:

curl: (7) Failed to connect to raw.githubusercontent.com port 443: Connection refused
因为这是国外网站,由于GFW(中国长城防火墙)的存在,如果没有vpn,是无法访问的,所以连接被拒绝!

别着急,有办法解决!

只要我们从国内镜像网站安装,就一切OK了。

以下为国内安装Homebrew的正确姿势:(基于gitee上某大神的自动安装脚本)

/bin/zsh -c "$(curl -fsSL https://gitee.com/cunkai/HomebrewCN/raw/master/Homebrew.sh)"
回车执行指令后,根据提示操作。具体包括以下提示操作:

(1)选择下载镜像

根据需要选择下载源,例如,我这里选择中科大下载源,就输入‘1’,回车。

(2)确认删除旧版本

如果存在旧版本,会弹出删除旧版本提示,输入"Y",回车。

(3)输入开机密码(用于mac确认第三方应用安装)

(4)安装git

如果之前没有安装过git,会终止homebrew安装,弹出git安装提示,点击“安装”。

(5)再次执行homebrew安装指令

耐心等待git安装完成后,再次运行homebrew安装指令,重新根据提示操作即可。

安装需要一段时间,过程中,可以在终端看到脚本执行了那些操作。

(6)验证是否安装成功

安装脚本执行完成后,重启终端。(重启后才生效)

通过在终端输入"brew -v",可以查看homebrew版本。

如果正确输出版本信息,表示成功安装。

虽然叫做’Homebrew’,但实际使用时,命令是’brew’。
qiuxiannv@qiuxiannvdeMBP ~ % brew -v
Homebrew 3.1.7-42-gd45832b
Homebrew/homebrew-core (git revision 09d1a8b385; last commit 2021-05-15)
Homebrew/homebrew-cask (git revision c1dad4a5cf; last commit 2021-05-15)
qiuxiannv@qiuxiannvdeMBP ~ %
在M1芯片上,homebrew的安装路径为:"/opt/Homebrew/"
三、Homebrew卸载

如需卸载,使用指令:

/bin/zsh -c "$(curl -fsSL https://gitee.com/cunkai/HomebrewCN/raw/master/HomebrewUninstall.sh)"
如果有用,点个赞吧~

END
发布于 2021-05-16 01:16

在阿里云主机上安装docker并启动服务

#阿里云 #主机维护
• 阿里云的主机os是ubuntu,目前版本20.04.03,今天(20230726)为了安装docker进行了升级,主要是各种老的package的升级,我还没决定是否要把os升级到22.04.2,这个版本跨度有点大了。

在阿里云主机上安装docker并启动一个测试服务的过程
1. 首先确保ubuntu上的各种package是最新的
2. 在ubuntu上安装docker
3. 安装docker的镜像
4. 启动镜像文件

  • 由于镜像文件默认的端口映射是80:80,导致与host上的端口冲突,因此更换为8081
    
    1. 通过域名+端口方式访问服务
  • 不成功,发现原因是阿里云没有开放8081端口
    
  • 去阿里云控制台,ecs云主机-》安全组-〉增加8081-8088端口
    
    1. 可以在本机通过域名方式访问docker的demo 服务了

/etc/zshrc

用最简洁的方式,在prompt里实现git branch的信息

增加parse_git_branch函数

final version

parse_git_branch() {
     git branch 2> /dev/null | sed -e '/^[^*]/d' -e 's/* \(.*\)/ (\1)/'
}

PS1="%F{12}%D%d~%#>%f%F{red}\$(parse_git_branch)%f"

ZSH prompt的简单生成器

https://zsh-prompt-generator.site/

ZSH现实git branch的另外一种方法

autoload -Uz vcs_info
precmd_vcs_info() { vcs_info }
precmd_functions+=( precmd_vcs_info )
setopt prompt_subst
#RPROMPT=$vcs_info_msg_0_
PS1="%F{cyan}%D%d~%#>%f"$vcs_info_msg_0_

reference

add git branch name to bash prompt

https://scriptingosx.com/2019/07/moving-to-zsh-06-customizing-the-zsh-prompt/

解决git无法push的问题

背景

5月16日,也就是前天,我开始学习李辉的Flask入门教程

目的很简单,由于花了一周时间学习Miguel Grinberg的The Flask Mega-Tutorial,在第四章“Database”上的时间有将近3天。我感觉自己的进度有些快,步子太大,终于扯到了。

按照推特上这位大神的说法,要享受海洋般的码农的工作机会,要经历9层磨难:Flask是第7层,Database是第8层。

wecom-temp-90ebe03d8c5e0ab68eda5686bd5102e9

在第8层滞留许久后,我开始采用李辉的教程,这个教程恰好与Miguel Grinberg的教材在部分知识点上互补。比如【Mega-Tutorial】介绍使用git时,仅仅介绍了git clone命令,方便读者不用逐行敲代码,而【Flask入门教程】对git的介绍就更实用,从git repo的建立开始,包括如何管理自己的git hub页面。

使用git完成watchlist项目后,依葫芦画瓢,我在microblog的项目上也使用了类似命令,但是问题就发生了:

22-05-18/Users/xxxxx/study/test~%>git branch -a
*flask
master

似乎自己就被困在了【Mega-Tutroial】的怪圈里,我估计原因是使用git clone后,默认的分支就是flask,而不是自己新建的master分支,而且无法删除flask这个主分支。

最直接的办法,是新建了一个test目录,在这个目录下把所有文件拷贝到flasktest下面,对原来的内容覆盖掉。

cp -rf flasktest/. test

然而,除了主branch变成master外,一切照旧。

问题现象与分析

现象

我开始就认为是权限问题,“access rights”。

22-05-18/Users/XXXXX/study/flasktest~%>git pull
ERROR: Repository not found.
fatal: Could not read from remote repository.

Please make sure you have the correct access rights
and the repository exists.

所以把努力方向放在如何优化授权上面,比如把私钥再增加一次:

ssh-add ~/.ssh/id_rsa
22-05-18/Users/XXXXX/study/flasktest~%>ssh-add -l
3072 SHA256:n9EHVCpvMuEfdkajdfkajfdkjakdfjakjdfak//Q5pbok XXXXXXXX@dfjakjdfjdfajdfa (RSA)

分析

由于告警信息中也出现了“no work tree”,网上有类似分析说这是bare repository:
The direct reason for the error is that yes, it’s impossible to use git-add with a bare repository. A bare repository, by definition, has no work tree. git-add takes files from the work tree and adds them to the index, in preparation for committing.
尝试去除bare:

git config --unset core.bare

也有意见说,在git的配置文件里,把origin相关信息都屏蔽掉:

22-05-18/Users/xxxxxxxxx/study/test/.git~%>vi config
[core]
        repositoryformatversion = 0
        filemode = true
        bare = false
        logallrefupdates = true
        ignorecase = true
        precomposeunicode = true
#[remote "origin"]
#       url = git@github.com:xxxxxxxx/flasktest.git
#       fetch = +refs/heads/*:refs/remotes/origin/*
#[remote "origin"]
#       url = git@github.com:xxxxxxxx/flasktest.git
#       fetch = +refs/heads/*:refs/remotes/origin/*
[remote "origin"]
        url = git@github.com:xxxxxxxxx/flasktest.git
        fetch = +refs/heads/*:refs/remotes/origin/*

问题解决

折腾了2天,最后只能盯着屏幕告警,突然发现“and the repository exists”,这句话提醒我,是不是这个repo根本就没有创建成功过?

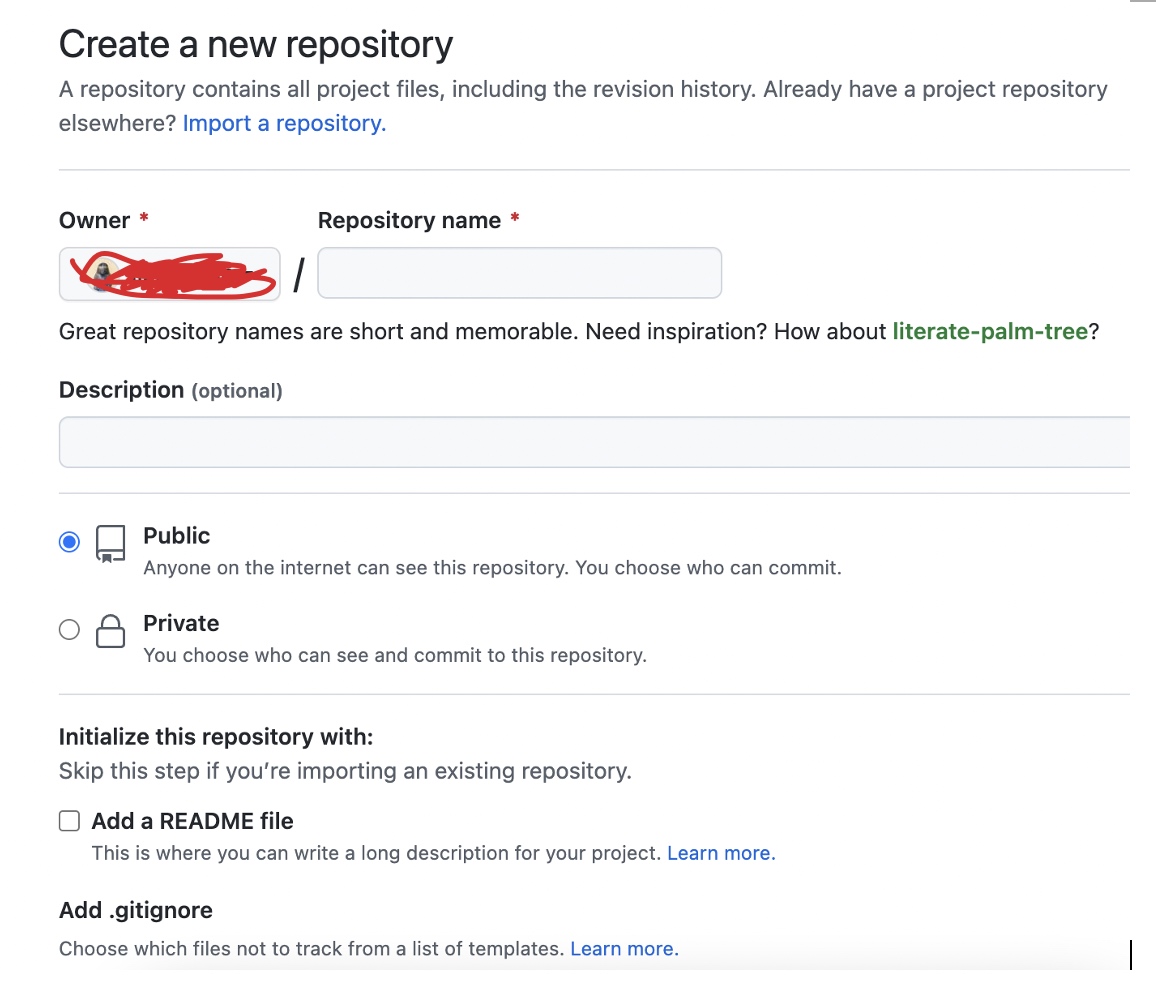
立即上github,手动创建repo。

然后一切水到渠成

22-05-18/Users/xxxxxx/study/flasktest~%>git branch -a
* master
  remotes/origin/master

反思

  1. 想当然认为,repo是通过git命令行来建立的,因此不断的假设flasktest.git已经建立好了;
  2. 并没有认真对待git,git的培训教程也没有认真学习。

git培训教材

Git

基本操作

绑定用户名和邮箱地址

(venv) 22-05-17/Users/XXXXX/study/watchlist~%>git --version
git version 2.30.1 (Apple Git-130)
(venv) 22-05-17/Users/xxxxx/study/watchlist~%>git config --global user.nam
e "xxxxxxx"
(venv) 22-05-17/Users/xxxxx/study/watchlist~%>git config --global user.ema
il "xxxxxx@outlook.com"

查看本地分支

test~%>git branch -vv
* flask     71a338f this is a test of microblog project
  flasktest 71a338f this is a test of microblog project
  master    71a338f this is a test of microblog project

查看远程分支

watchlist~%>git branch -r
  origin/master

删除本地分支

microblog/test~%>git branch -d flasktest
Deleted branch flasktest (was 71a338f).

查看配置列表

test~%>git config --list
remote.origin.url=git@github.com:XXXXXX/flasktest.git
remote.origin.fetch=+refs/heads/*:refs/remotes/origin/*
branch.master.remote=origin

push与pull

push命令

push命令用来将远程分支内容,拉取到本地分支上,当远程分支和本地分支名称一致时,可以省略本地分支名称,push命令中的origin会让人很疑惑

pull命令

push与pull命令参考

建立或删除本地库与远程库的绑定

建立本地库与远程库的绑定关系,和远程库进行绑定时,需要给远程库一个名字,一般来说origin就是默认的名称

xxx/flasky/watchlist~%>git remote add origin git@github.com:xxx/watchlist.git

删除本地库和远程库的绑定,注意这里只是删除了本地库与远程库之间的映射关系,并没有真的删除任何物理内容。

xxx/flasky/watchlist/watchlist~%>git remote rm origin
xxx/flasky/watchlist/watchlist~%>git remote -v

如果有绑定的远程库,命令“git remote -v”会显示如下

现在因为我使用git remote rm origin命令删除了绑定关系,则git remote -v什么都不会显示,因为linux的最大理念就是,“没有消息就是好消息”😊

fatal: refusing to merge unrealated histories

xxxx/flasky/watchlist~%>git pull origin master
From https://github.com/xxxx/watchlist
 * branch            master     -> FETCH_HEAD
fatal: refusing to merge unrelated histories

The “fatal: refusing to merge unrelated histories” Git error occurs when two unrelated projects are merged, and two projects are unaware of each other existence and having mismatch commit histories.
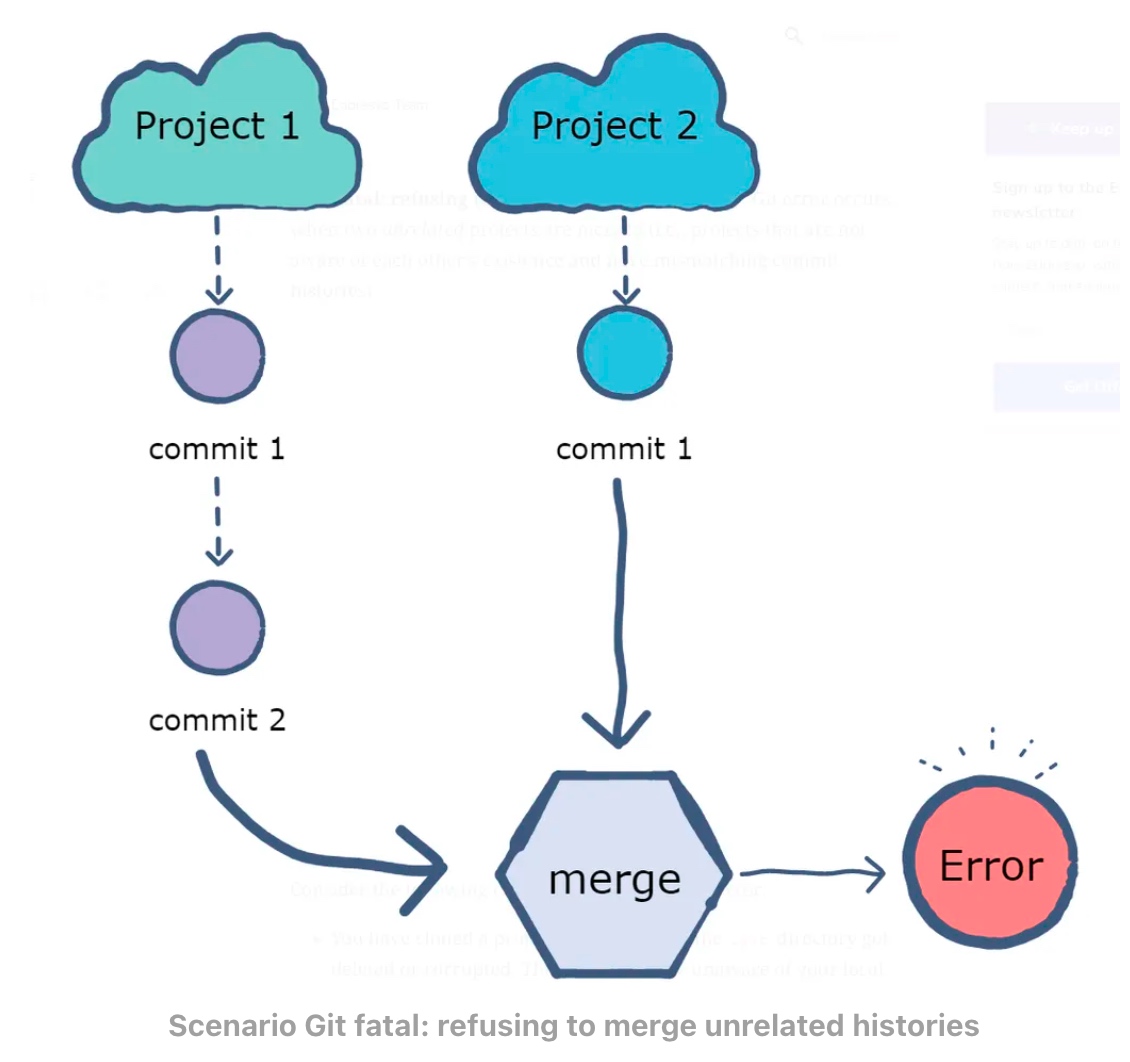
To provide a little background .git directory, which is usually hidden, contains all the changes or “commits” of the repo that gets tracked. Rewriting the repository history is possible, but it’s generally not the typical use case. Git is used for version control, which means to track the history of the file.

Use Cases that lead to git fatal: refusing to merge unrelated histories

If you have cloned a repository and, for some reason, the .git folder is corrupted or deleted. Since git will be unaware of your local history, any action you perform like git pull or git push to remote repository will throw this error as there is no tracking information for the current branch.
You have created a new repository, made few commits to it, and now try to pull a remote repository that already has its own commits. Git will throw an error here since it is unaware of how these two projects and commits are related.

The solution to Refusing to merge unrelated histories

The error started occurring from git version 2.9.0 release notes and above. To solve this issue –allow-unrelated-histories flag when pulling the data from remote repository.

解决unrelated histories问题参考

全流程概要

  • 1 绑定用户名和邮箱地址(SSH指纹也提前关联好)
  • 2 mkdir watchlist
  • 3 初始化本地库
xxxx/flasky/watchlist~%>git init
Initialized empty Git repository in /Users/xxxx/Study/flasky/watchlist/.git/
  • 4 绑定本地库与远程库
flasky/watchlist~%>git remote add origin git@github.com:madapapa/watchlist.git
  • 5 查看远程库
xxxx/flasky/watchlist~%>git remote -v
origin	git@github.com:madapapa/watchlist.git (fetch)
origin	git@github.com:madapapa/watchlist.git (push)
  • 6 同步远程库内容,忽略unrelated histories问题
xxxx/flasky/watchlist~%>git pull origin master --allow-unrelated-histories
remote: Enumerating objects: 49, done.
remote: Counting objects: 100% (49/49), done.
remote: Compressing objects: 100% (33/33), done.
remote: Total 49 (delta 16), reused 38 (delta 10), pack-reused 0
Unpacking objects: 100% (49/49), 438.70 KiB | 477.00 KiB/s, done.
From github.com:madapapa/watchlist
 * branch            master     -> FETCH_HEAD
 * [new branch]      master     -> origin/master
  • 7 我没有新建gitignore文件

  • 8 在本地修改文件后,进行提交工作

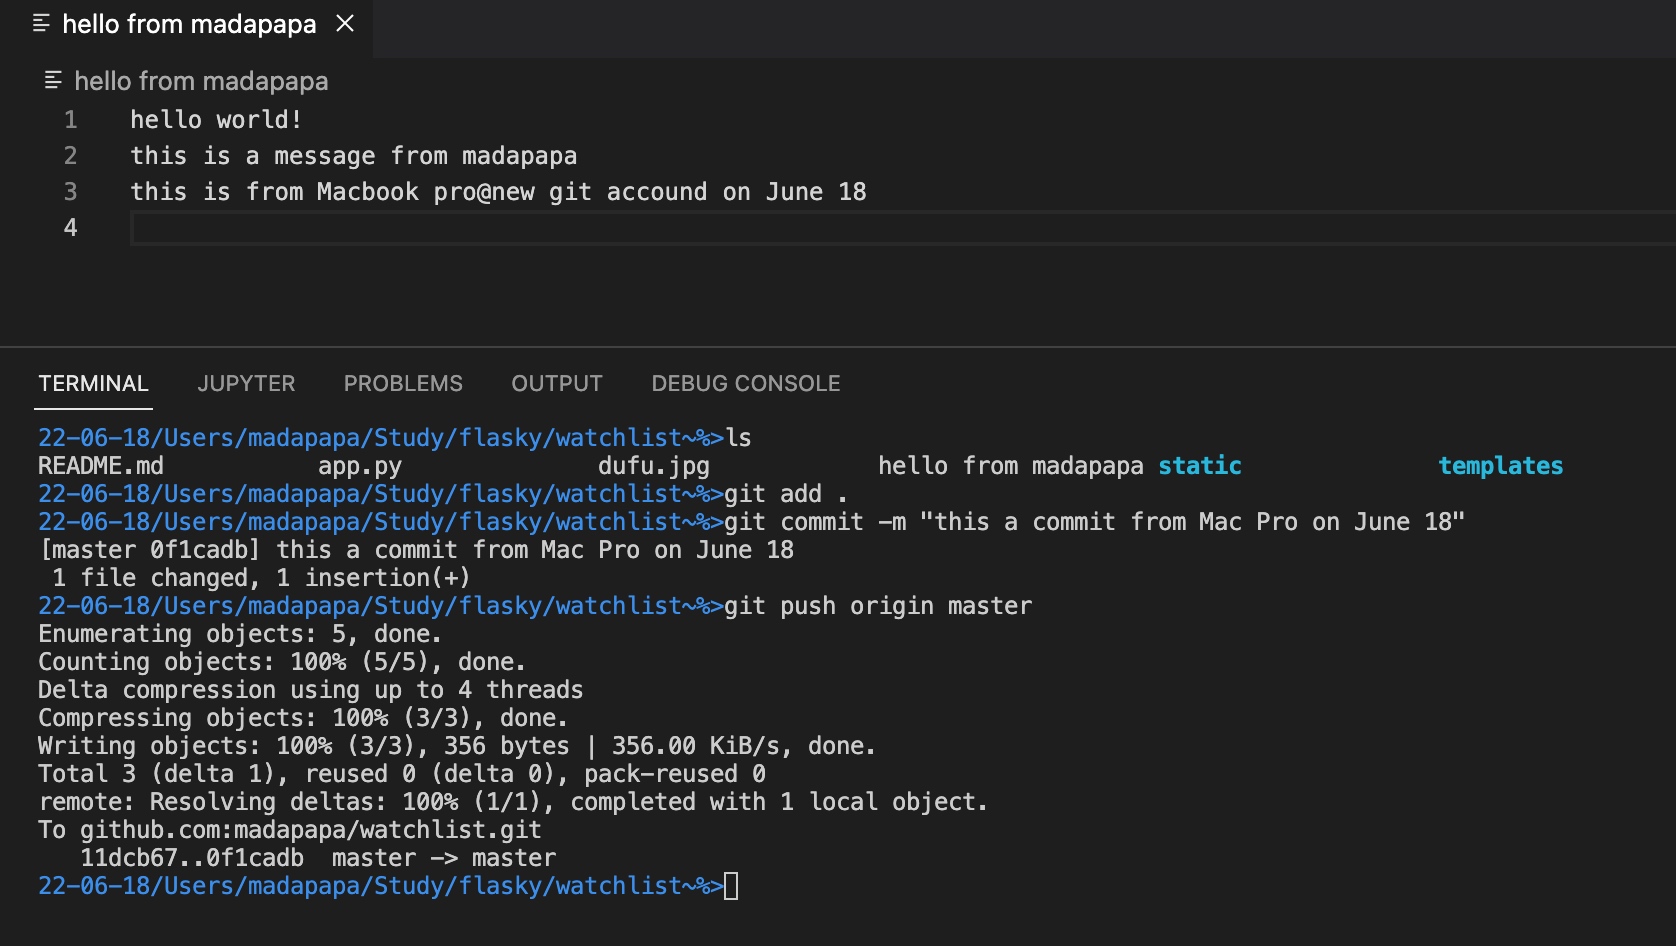
【注意】这里的push命令在第一次使用时,一般建议附带-u参数,这样Git不仅会把本地master分支的内容更新到远程新建的master分支上,还会把本地master和远程的master关联起来,在以后的推送和拉取时就可以简化命令(不需要带-u参数,直接git push即可)。
git常用命令

折腾苹果电脑的zsh

早晨看miguel grinberg的视频,发现他用的iterm2挺好看。然后打开自己的iterm2进行配置,说实话只是简单的配置了绿色字体,但是提示符是没法通过profile来修改的。

随后的2个小时,就是用来折腾zsh,今天算是有了心得。

首先是,修改zshrc的权限(MDMacpro这台电脑)

chmod 666 zshrc

然后修改zshrc

下面是更改颜色,其中省略号部分,全部会改成期望的颜色(这里是蓝色,12,也可以用blue来替代–但是我没有尝试)

%F{12}......%f

%D代表日期(年月日) %d代表当前目录。

非常简洁,而且iterm和terminal的界面会同时更改。

我的另外一台电脑(工作电脑),用了oh my zsh,只要使用

opebn ~/.zshrc

把ZSH_THEME注释掉,就可以使用PS1的方式来修改提示符了。

flask小技巧

“(venv) $ export FLASK_APP=hello.py
(venv) $ export FLASK_DEBUG=1
(venv) $ flask run”

如下,当设置debug为1,允许reloader和debug两种模式,在reloader模式下,程序会自动检测code里的修改,非常方便的功能。

“(venv) $ flask run --help
Usage: flask run [OPTIONS]

  Runs a local development server for the Flask application.

  This local server is recommended for development purposes only but it can
  also be used for simple intranet deployments.  By default it will not
  support any sort of concurrency at all to simplify debugging.  This can be
  changed with the --with-threads option which will enable basic
  multithreading.

  The reloader and debugger are by default enabled if the debug flag of

Options:
  -h, --host TEXT                 The interface to bind to.
  -p, --port INTEGER              The port to bind to.
  --reload / --no-reload          Enable or disable the reloader.  By default
                                  the reloader is active if debug is enabled.
  --debugger / --no-debugger      Enable or disable the debugger.  By default
                                  the debugger is active if debug is enabled.
  --eager-loading / --lazy-loader
                                  Enable or disable eager loading.  By default
                                  eager loading is enabled if the reloader is
                                  disabled.
  --with-threads / --without-threads
                                  Enable or disable multithreading.
  --help                          Show this message and exit.”

Git 小技巧

获取第二章的sample代码

git checkout v0.2

从0.1切换到0.2时,出现如下告警

git checkout v0.2
error: Your local changes to the following files would be overwritten by checkout:
        app/routes.py
Please commit your changes or stash them before you switch branches.
Aborting

我选择放弃本地修改,切换到其他章节的代码,还有几种备选方案,可以看参考。

git reset --hard
HEAD is now at 23b3fc8 Chapter 1: Hello, World! (v0.1)
(venv) XXXXXX microblog % git checkout v0.2
Previous HEAD position was 23b3fc8 Chapter 1: Hello, World! (v0.1)
HEAD is now at 5d45592 Chapter 2: Templates (v0.2)

参考

you have three options:

Commit the change using
git commit -m "My message"
Stash it.
Stashing acts as a stack, where you can push changes, and you pop them in reverse order.

To stash, type

git stash
Do the merge, and then pull the stash:

git stash pop
Discard the local changes
using git reset --hard
or git checkout -t -f remote/branch

Or: Discard local changes for a specific file
using git checkout filename