brew和zsh的小问题

brew

昨天开始学习opencv,一天时间把环境都没有搞好,主要是mac系统升级到big sur以后,brew出现了很多告警,而且跟新起来除了很多问题,包括使用【brew update-reset】重新安装xcode tools也不行,终于下定决心,重新安装brew,问题基本搞定,安装脚本如下

/bin/zsh -c "$(curl -fsSL https://gitee.com/cunkai/HomebrewCN/raw/master/Homebrew.sh)"

然后依次安装opencv和scipy库

brew doctor
brew install python(我已经安装好了)
brew install opencv
brew install scipy

查看opencv版本如下

opencv_version

ZSH

使用国内中科大的源,安装完brew后,每次打开terminal,会出现如下提示

[oh-my-zsh] Insecure completion-dependent directories detected:
drwxrwxrwx 7 hans admin 238 2 9 10:13 /usr/local/share/zsh
drwxrwxrwx 6 hans admin 204 10 1 2017 /usr/local/share/zsh/site-functions

大意是zsh认为目录权限有问题,解决方法如下

chmod 755 /usr/local/share/zsh
chmod 755 /usr/local/share/zsh/site-functions
参考
1 zsh问题
2 brew中科大源

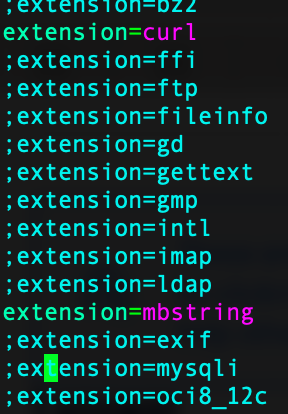
curl 和 mbstring,更新CentOs7,解决mysql.sock丢失问题

对于Ubuntu.20:

需要安装对应php版本的curl和mbstring

apt-get install php8.0-curl
apt-get install php8.0-mbstring

修改fpm目录下的php.inn文件
Screen Shot 2021-01-25 at 6.15.20 PM

重启php服务

systemctl restart php8.0-fpm.service

对于Centos7:

curl是内建的,所以只用安装mbstring

yum install php-mbstring

更新Centos

首先检查CentOS可用更新,显示应用和核心系统升级

yum check-update

然后清理以前的软件包,并重启

yum clean all
# reboot

开始升级

yum update

查看linux版本

cat /etc/redhat-release

恢复mysql.sock文件

这时发现浏览器里显示数据库无法连接,repair页面也打不开,进入mysql显示ERROR2002,同时mariadb的状态也变成inactive

#mysql
ERROR 2002 (HY000): Can't connect to local MySQL server through socket '/var/lib/mysql/mysql.sock' (2)

使用find 命令也找不到mysql.sock
原因如下“连接localhost通常通过一个Unix域套接字文件进行,一般是/tmp/mysql.sock。如果套接字文件被删除了,本地客户就不能连接。这可能发生在你的系统运行一个cron任务删除了/tmp下的临时文件。

如果你因为丢失套接字文件而不能连接,你可以简单地通过重启服务器重新创建得到它。因为服务器在启动时重新创建它”

参考
mysql.sock问题
)

轻松解决PHP8没有mysql插件问题

修复好info.php问题后,安装wordpress,创建数据库,修改wp-config.php,都很顺利,但是最后一步,进入浏览器后,出现下面告警
‘Your PHP Installation Appears to Be Missing the MySQL Extension Which Is Required by WordPress’

下面的网站虽然有一定参考意义,但是帮不了我。
方案1 How to Fix

还是靠自力更生,当然也参考方案2,通过非常简单的办法解决了问题。
直接sudo安装php8.0-mysqlnd即可

root@MDaliyun / # apt-get install php8.0-mysqlnd

Screen Shot 2021-01-24 at 11.16.37 PM

然后重新启动服务器

root@MDaliyun / # reboot

方案2 How To Fix "Your PHP Installation Appears To Be Missing The MySQL Extension Which Is Required By WordPress"

解决PHP8.0.1@Ubuntu20.04.1中PHP无法工作的问题

前两周在阿里云Ubuntu20.04上安装最新php8.0后,测试phpinfo,总是无法出现成功的测试结果,往往是直接下载info.php这个文件,这事情困扰我2周,今天终于搞定了。

Screen Shot 2021-01-23 at 10.48.51 AM

第一步:升级系统最新补丁

首先要确定php和nginx都更新到了最新状态

sudo apt-get update && apt-get upgrade

检查nginx版本

nginx -v

测试nginx配置文件是否有错误

nginx -t

Screen Shot 2021-01-23 at 11.04.16 AM

检查php状态

systemctl status php8.0-fpm.service

Screen Shot 2021-01-23 at 11.06.32 AM

第二步a:修改php和nginx的配置文件

修改php.ini

./etc/php/8.0/fpm/php.ini

这里我没有做任何修改
Screen Shot 2021-01-23 at 11.09.32 AM

第二步b修改nginx默认站点配置

这里是关键:

不是修改“./etc/nginx/nginx.conf”这个文件!!

进入/etc/nginx/sites-available,修改dafault,当然,先做好备份
然后编辑下面绿色部分,取消掉注释,然后把php7.4-fpm修改为php8.0-fpm,注意后面的括号也要去掉注释

Screen Shot 2021-01-23 at 11.17.45 AM

最后,不要忘记删除info.php这个文件。

参考如下:Update! Configure Nginx to Read PHP on Ubuntu 16.04

Ubuntu完全卸载nginx服务器

方法1

使用‘sudo apt-get –purge remove nginx’彻底删除

# sudo service nginx stop
# sudo apt-get --purge remove nginx
Reading package lists... Done
Building dependency tree
Reading state information... Done
The following packages were automatically installed and are no longer required:
  fontconfig-config fonts-dejavu-core libfontconfig1 libgd3 libjbig0 libjpeg-turbo8 libjpeg8
  libnginx-mod-http-image-filter libnginx-mod-http-xslt-filter libnginx-mod-mail
  libnginx-mod-stream libtiff5 libwebp6 libxpm4 libxslt1.1 nginx-common nginx-core
Use 'sudo apt autoremove' to remove them.
The following packages will be REMOVED:
  nginx*
0 upgraded, 0 newly installed, 1 to remove and 0 not upgraded.
After this operation, 45.1 kB disk space will be freed.
Do you want to continue? [Y/n] y
perl: warning: Setting locale failed.
perl: warning: Please check that your locale settings:
        LANGUAGE = (unset),
        LC_ALL = (unset),
        LC_CTYPE = "UTF-8",
        LANG = "en_US.UTF-8"
    are supported and installed on your system.
perl: warning: Falling back to a fallback locale ("en_US.UTF-8").
locale: Cannot set LC_CTYPE to default locale: No such file or directory
locale: Cannot set LC_ALL to default locale: No such file or directory
(Reading database ... 117708 files and directories currently installed.)
Removing nginx (1.18.0-0ubuntu1) ...

方法2

自动移除全部不使用的软件包

sudo apt-get autoremove

列出与nginx相关的软件,并依次删除显示的软件,这个方法更加通用,我照猫画虎使用在php上面,也非常靠谱(php8.0-fpm)

dpkg --get-selections|grep nginx
sudo apt-get --purge remove nginx
sudo apt-get --purge remove nginx-common
sudo apt-get --purge remove nginx-cor

使用ps命令查看相关进程,-A显示有限信息,-l显示详细信息 -e显示所有进程,aux显示系统所有进程

ps -le | grep nginx

参考材料如下
https://blog.csdn.net/adley_app/article/details/79223221

ps命令
http://c.biancheng.net/view/1062.html

删除apache2
https://blog.csdn.net/dazhi_100/article/details/43121179

Ubuntu20.04.1 LTS安装PHP8.0.1

这是目前全网最新的安装指南了。

首先,20.04.1版本的Ubuntu没有包括8.0.1PHP,所以需要安装第三方的PPA库来进行安装,下面的命令增加第三方PPT到Ubuntu

sudo apt update
sudo apt-get install software-properties-common
sudo add-apt-repository ppa:ondrej/php
sudo add-apt-repository ppa:ondrej/nginx

与Apache不同,Nginx没有对php文件的内建支持,因此使用php-fpm(fastCGI process manager)来处理PHP文件。

目前最新的php版本是8.0.1,但是aliyun没法自动安装这个源,手动安装太麻烦,因此我只有先用8.0来试试。

和Apache2不同,Nginx自己没有自建队php的处理支持,所以需要分别安装Nginx和PHP

#sudo apt update
#sudo apt install nginx php8.0-fpm

重新启动Nginx和PHP-FRM

sudo systemctl restart nginx
sudo systemctl restart php8.0-fpm

检查服务状态如下

systemctl status php8.0-fpm.service

现在你可以编辑服务器配置,方便Nginx处理PHP文件。

由于Nginx没有内建PHP支持,所以需求手工编辑server部分来支撑PHP,如下

sudo nano /etc/nginx/sites-available/default

编辑下文粗体部分

   # Add index.php to the list if you are using PHP
        index index.php index.html index.htm index.nginx-debian.html;
        # pass PHP scripts to FastCGI server
        #
        location ~ \.php$ {
                include snippets/fastcgi-php.conf;
        #
        #       # With php-fpm (or other unix sockets):
                fastcgi_pass unix:/var/run/php/php8.0-fpm.sock;
        #       # With php-cgi (or other tcp sockets):
        #       fastcgi_pass 127.0.0.1:9000;
        }
        # deny access to .htaccess files, if Apache's document root
        # concurs with nginx's one

然后reload两个服务

sudo systemctl reload nginx
sudo systemctl reload php8.0-fpm

参考文档如下
https://websiteforstudents.com/install-php-8-0-on-ubuntu-20-04-18-04/

安装MariaDB

通过mysql进入数据库

MariaDB [(none)]> create database wordpress;
Query OK, 1 row affected (0.002 sec)
MariaDB [(none)]> create user 'user'@'localhost' identified by 'password';
Query OK, 0 rows affected (0.002 sec)
MariaDB [(none)]> grant all privileges on wordpress.* to 'user'@'localhost' identified by 'password';
Query OK, 0 rows affected (0.000 sec)
MariaDB [(none)]> flush privileges;
Query OK, 0 rows affected (0.000 sec)

参考文档如下
https://developer.aliyun.com/article/761741