几个高级的minikube命令
Now that we have familiarized ourselves with the default minikube start command, let’s dive deeper into Minikube to understand some of its more advanced features.
The minikube start by default selects a driver isolation software, such as a hypervisor or a container runtime, if one (VitualBox) or multiple are installed on the host workstation. In addition it downloads the latest Kubernetes version components. With the selected driver software it provisions a single VM named minikube (with hardware profile of CPUs=2, Memory=6GB, Disk=20GB) or container to host the default single-node all-in-one Kubernetes cluster. Once the node is provisioned, it bootstraps the Kubernetes control plane (with the default kubeadm tool), and it installs the latest version of the default container runtime, Docker, that will serve as a running environment for the containerized applications we will deploy to the Kubernetes cluster. The minikube start command generates a default minikube cluster with the specifications described above and it will store these specs so that we can restart the default cluster whenever desired. The object that stores the specifications of our cluster is called a profile.
As Minikube matures, so do its features and capabilities. With the introduction of profiles, Minikube allows users to create custom reusable clusters that can all be managed from a single command line client.
The minikube profile command allows us to view the status of all our clusters in a table formatted output. Assuming we have created only the default minikube cluster, we could list the properties that define the default profile with:
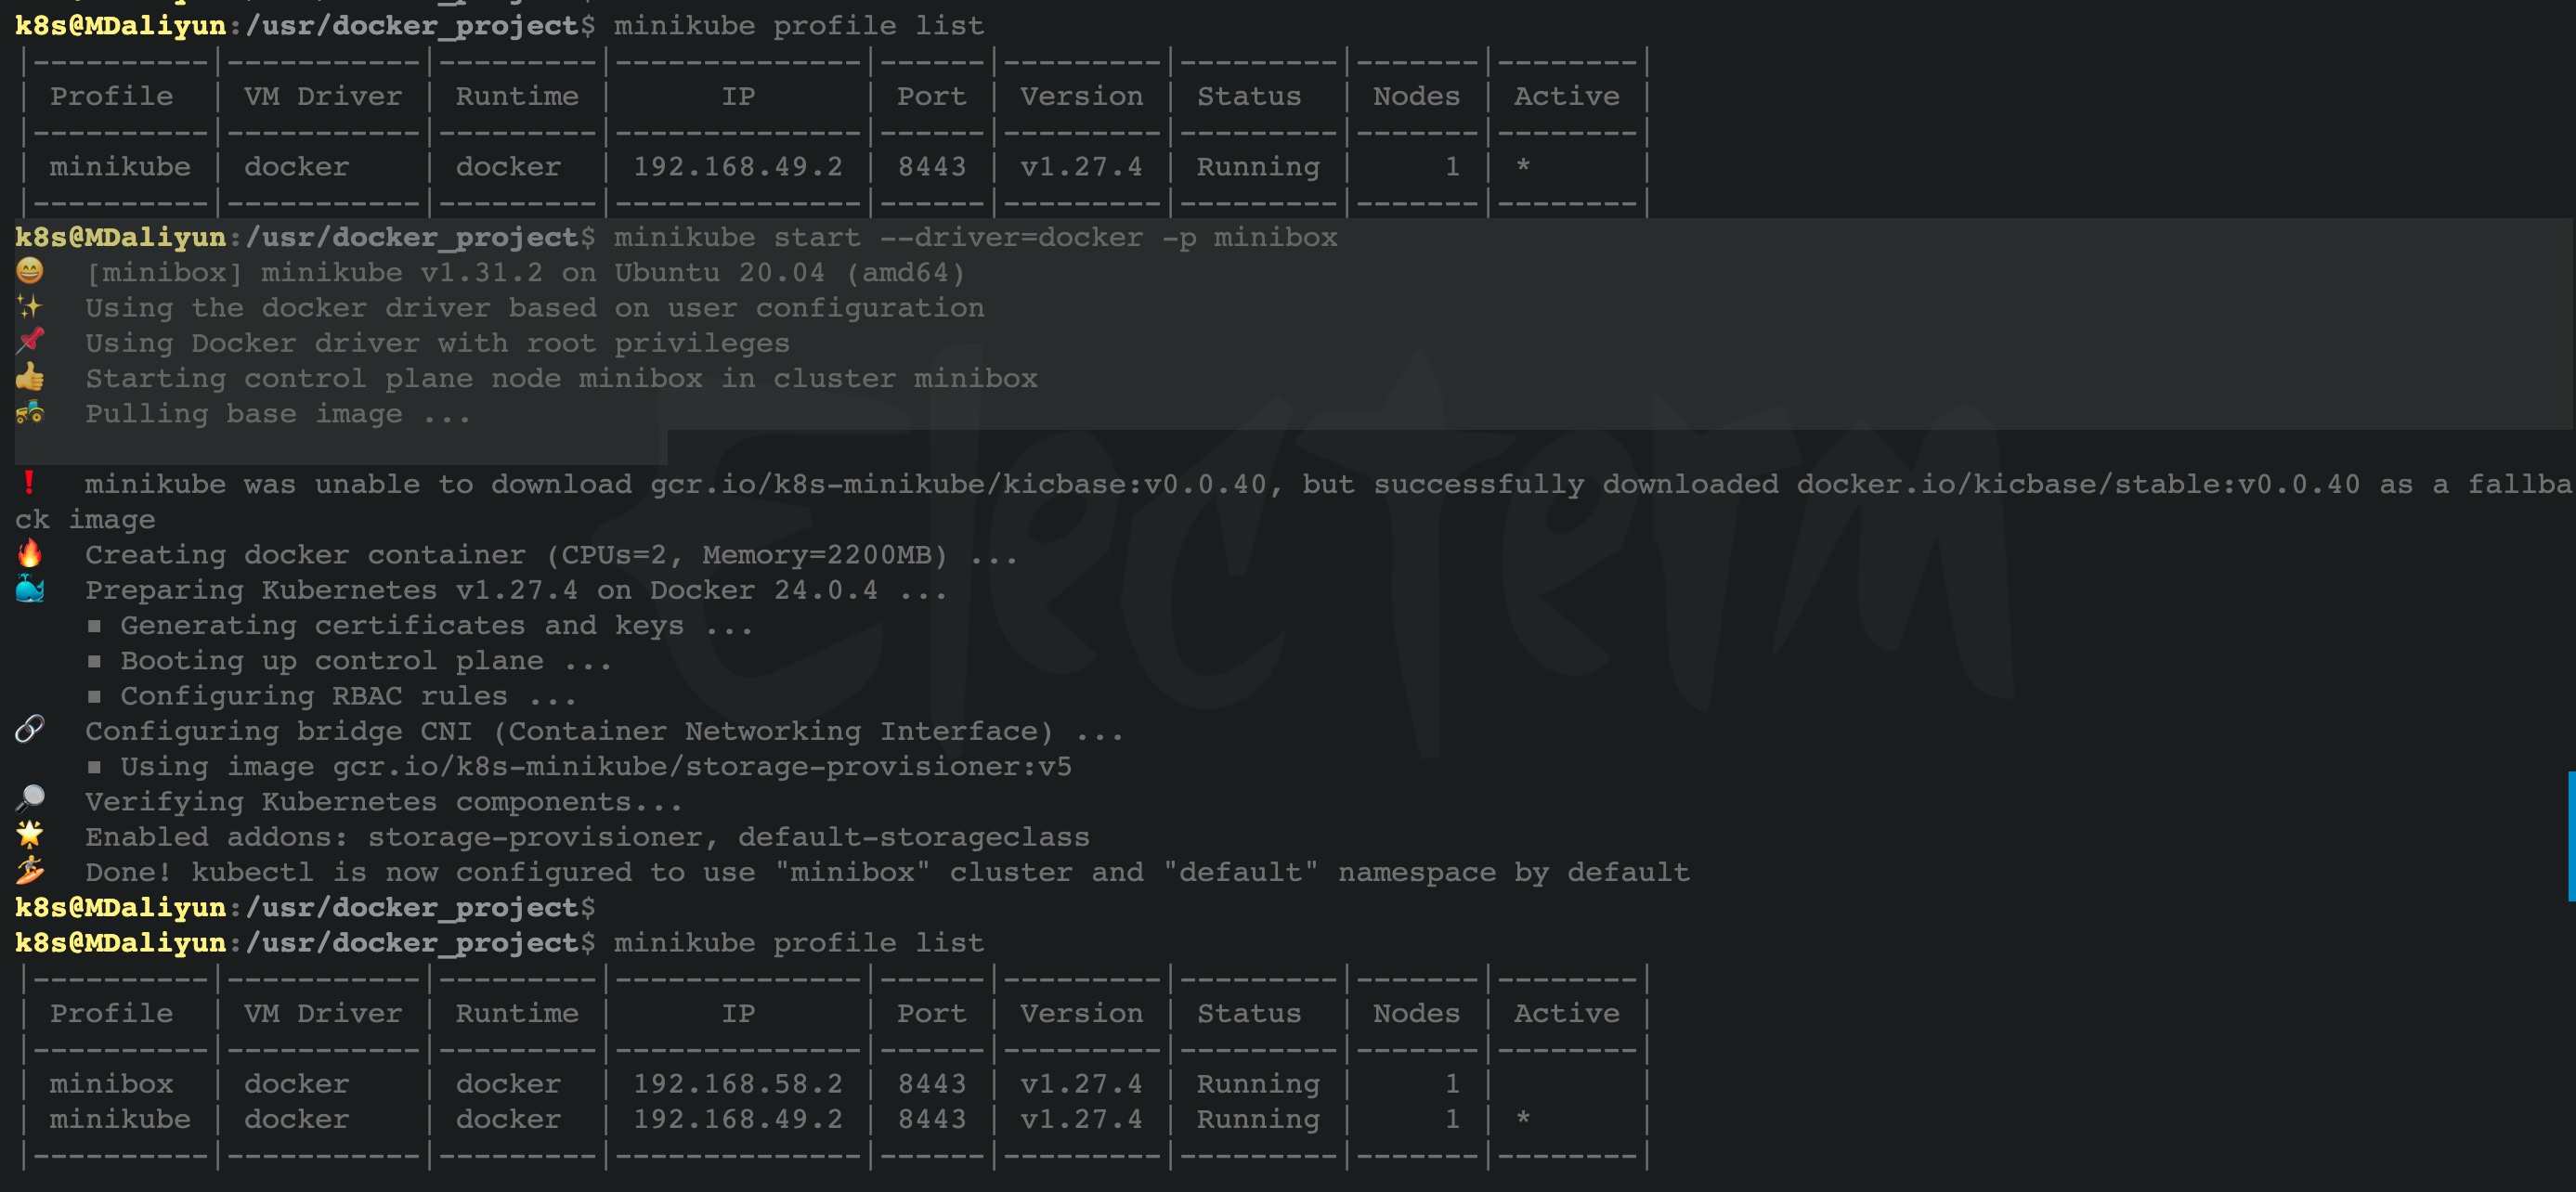
$ minikube profile list
|———-|————|———|—————-|——|———|———|——-|——–|
| Profile | VM Driver | Runtime | IP | Port | Version | Status | Nodes | Active |
|---|---|---|---|---|---|---|---|---|
| minikube | virtualbox | docker | 192.168.59.100 | 8443 | v1.25.3 | Running | 1 | * |
| ———- | ———— | ——— | —————- | —— | ——— | ——— | ——- | ——– |
This table presents the columns associated with the default properties such as the profile name: minikube, the isolation driver: VirtualBox, the container runtime: Docker, the Kubernetes version: v1.25.3, the status of the cluster – running or stopped. The table also displays the number of nodes: 1 by default, the private IP address of the minikube cluster’s control plane VirtualBox VM, and the secure port that exposes the API Server to cluster control plane components, agents and clients: 8443.
What if we desire to create several reusable clusters instead, with other drivers (Docker or Podman (still experimental on Linux)) for node isolation, or different Kubernetes versions (v1.23.3 or v1.24.4), another runtime (cri-o or containerd), and possibly 2, 3, or more nodes (if permitted by the resources of our host system)? What if we desire to further customize the cluster with a specific networking option or plugin? The minikube start command allows us to create such custom profiles with the –profile or -p flags. Several of the isolation drivers support creation of node VMs or node containers of custom sizes as well, features that we will not explore in this course as not all are very stable at the time of this writing.
Below are a few examples of more complex start commands that allow custom clusters to be created with Minikube. They assume that the desired driver software (Docker and/or Podman) has been installed on the host workstation. There is no need to download the desired CNI (network plugin) or the container runtime, they will be set up and enabled by Minikube on our behalf:
$ minikube start –kubernetes-version=v1.23.3
–driver=podman –profile minipod
$ minikube start –nodes=2 –kubernetes-version=v1.24.4
–driver=docker –profile doubledocker
$ minikube start –driver=virtualbox –nodes=3 –disk-size=10g
–cpus=2 –memory=4g –kubernetes-version=v1.25.1 –cni=calico
–container-runtime=cri-o -p multivbox
$ minikube start –driver=docker –cpus=6 –memory=8g
–kubernetes-version="1.24.4" -p largedock
$ minikube start –driver=virtualbox -n 3 –container-runtime=containerd
–cni=calico -p minibox
Once multiple cluster profiles are available (the default minikube and custom minibox), the profiles table will look like this:
$ minikube profile list
|———-|————|———|—————-|——|———|———|——-|——–|
| Profile | VM Driver | Runtime | IP | Port | Version | Status | Nodes | Active |
|---|---|---|---|---|---|---|---|---|
| minibox | virtualbox | crio | 192.168.59.101 | 8443 | v1.25.3 | Running | 3 | |
| minikube | virtualbox | docker | 192.168.59.100 | 8443 | v1.25.3 | Running | 1 | * |
| ———- | ———— | ——— | —————- | —— | ——— | ——— | ——- | ——– |
The active marker indicates the target cluster profile of the minikube command line tool. The target cluster can be set to minibox with the following command:
$ minikube profile minibox
The target cluster can be set to the default minikube with one of the following commands:
$ minikube profile minikube
$ minikube profile default
一个实际的例子

增加一个新的cluster
$ minikube start --driver=docker -p minibox